01603 327962
Biohazard cleaners are essential in ensuring safety and hygiene in environments impacted by hazardous materials, including crime scenes, contamination incidents, and medical emergencies. They provide specialised cleaning services that mitigate health risks associated with biohazardous environments. This document examines the responsibilities of biohazard cleaners, the qualifications required to enter this specialised field, and the risks associated with the profession. It also delineates the steps necessary to become a biohazard cleaner, encompassing training, skill development, and available job opportunities with renowned cleaning companies. The aim is to provide insight into the critical work performed by these professionals and the prerequisites for achieving success in this challenging yet rewarding career.
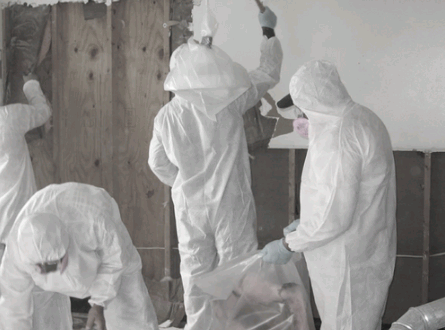
A biohazard cleaner is a specialised professional tasked with the safe and effective removal of biohazardous materials, which may encompass a wide range of substances, including bodily fluids, medical waste, industrial waste, and other hazardous materials. Their expertise in trauma cleaning and the use of cleaning chemicals is vital to mitigate health risks.
These professionals play a critical role in various environments, such as crime scenes, healthcare facilities, and industrial settings, where they help mitigate health risks and ensure adherence to stringent health regulations, government regulations, and cleaning protocols.
By employing advanced cleaning techniques, they adhere to rigorous procedures designed to eliminate viruses and bacteria, thereby safeguarding public health and safety in contaminated areas. Their work is crucial in the disinfection process, particularly in the context of infectious diseases like COVID-19.
Learn about: How Long Does It Take To Clean A Hoarder's House

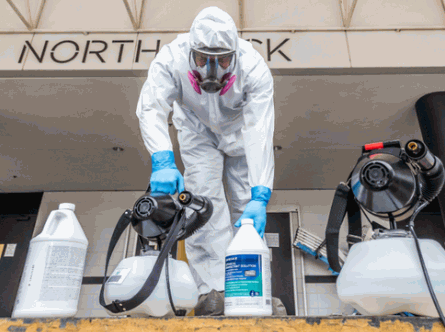
The qualifications of a biohazard cleaner are crucial for ensuring both the safety and effectiveness of the cleaning process. These professionals are required to complete appropriate training and certification programmes that provide a thorough understanding of biohazardous materials, including the various types of cleaning chemicals and the appropriate protocols for different scenarios. Knowledge of COSHH (Control of Substances Hazardous to Health) regulations is also critical.
Furthermore, knowledge of health and safety regulations is vital for maintaining compliance with health standards. Familiarity with personal protective equipment (PPE) is also essential to safeguard themselves during the disinfection process, especially when dealing with biohazard waste and potential exposure to pathogens such as HIV and hepatitis B.
Proper training and certification are essential components for individuals pursuing a career as a biohazard cleaner, ensuring they possess the requisite skills to manage the cleaning process effectively in hazardous environments. This includes specialised training in industrial cleaning and contamination cleanup.
Individuals aspiring to enter this field will encounter a range of training programmes specifically designed to provide them with the knowledge and expertise necessary for the safe handling of hazardous materials. These programmes typically encompass critical topics such as personal protective equipment (PPE), decontamination protocols, and the proper disposal of biohazardous waste. Certifications, including the following:
serve to validate the skills acquired and enhance professional credibility, making them competitive candidates for roles in cleaning companies specialising in biohazard cleaning.
The importance of practical experience during these training sessions cannot be overstated. Hands-on practice equips individuals to effectively respond to real-world challenges, such as unforeseen biological hazards or chemical spills, thereby fostering confidence and efficiency in their daily responsibilities.
A comprehensive understanding of HSE regulations is essential for biohazard cleaners, as these guidelines ensure adherence to health regulations and establish safety standards within the cleaning industry, particularly in the context of compliance with government regulations. This knowledge not only protects workers from potential hazards but also serves to safeguard the environment and the public from contamination risks associated with biohazard materials.
In the field of biohazard cleaning, strict compliance with HSE regulations is of utmost importance. Failure to adhere to these standards can lead to severe consequences, including substantial fines, legal repercussions, and compromised worker safety. Non-compliance may also result in heightened health risks and contamination. When biohazard cleaners do not align with these regulations, they risk exacerbating hazardous situations and exposing themselves and others to harmful pathogens.
To mitigate these risks, it is imperative for professionals in this sector to engage in ongoing education regarding updates to compliance standards. Regular training programmes enhance a cleaner's expertise and ensure that they remain well-informed about best practices for handling hazardous materials, including emerging threats from infectious diseases. This proactive approach to education give the power tos biohazard cleaners to perform their responsibilities safely and effectively.
An understanding of biohazardous materials is essential for biohazard cleaners, as it enables them to identify and safely manage various substances that pose health risks during the trauma cleaning process.
Biohazard cleaners must be knowledgeable about the different types of hazardous substances they may encounter on the job, which include biohazardous waste such as:
The use of appropriate cleaning chemicals and techniques is critical for each type of material, ensuring that public health is not compromised during the cleanup process. For example, while chlorine-based disinfectants may effectively eliminate pathogens in medical waste, more specialised solvents may be required for certain industrial substances.
Adhering to safety protocols, including the use of personal protective equipment (PPE) and following strict disposal guidelines, is paramount in preventing contamination and ensuring the safety of both the cleaner and the surrounding community. This is especially important in environments affected by biohazard cleaning tasks.
Physical and mental fitness are essential qualities for biohazard cleaners, given the demanding nature of the role which requires stamina, resilience, and the capacity to manage emotionally challenging situations that may arise in trauma cleaning and crime scene cleanups.
The responsibilities associated with this profession often entail considerable heavy lifting and extended periods of standing or movement, necessitating not only physical strength but also endurance. Cleaners frequently navigate tight spaces and handle hazardous materials, which further complicates their work in scenarios such as industrial cleaning.
The psychological demands of this profession are equally significant. Engaging with traumatic scenes, whether resulting from crime or other distressing incidents, can have a profound impact on mental health. Therefore, it is imperative for individuals in this field to cultivate effective coping strategies to manage stress. This mental resilience plays a crucial role in enhancing their overall job performance and maintaining concentration during particularly distressing tasks.
The responsibilities of a biohazard cleaner include a comprehensive array of tasks designed to ensure thorough decontamination and the safe disposal of hazardous materials, thereby safeguarding public health and safety.
These professionals are required to adhere to rigorous cleaning protocols and standards, meticulously documenting their procedures and actions to ensure compliance with health regulations.
From the proper handling and disposal of biohazardous materials to the careful cleaning of contaminated areas, biohazard cleaners are essential to the processes of contamination cleanup and risk mitigation, safeguarding public health and safety.
Proper handling and disposal of biohazardous materials are essential responsibilities of a biohazard cleaner, necessitating strict adherence to established cleaning protocols to ensure safety and compliance with COSHH guidelines.
These practices are crucial not only for protecting the individuals directly involved in the cleanup process but also for safeguarding the community and the environment from the repercussions of improper biohazard waste management. Appropriate disposal methods help mitigate the risk of contamination, which can lead to serious health issues for the public.
The following are essential methods and practices to consider:
By understanding and implementing these procedures, individuals can significantly reduce the health risks associated with improper handling and disposal, ultimately contributing to a safer environment and adhering to COSHH regulations.

Decontamination of affected areas represents a critical responsibility of biohazard cleaners, who employ specialised cleaning protocols to effectively eliminate potentially harmful pathogens and ensure a safe environment.
The decontamination process entails several essential steps to achieve thorough cleaning and sanitisation. Initially, the affected area is assessed to determine the extent of contamination, followed by the establishment of an exclusion zone to prevent accidental exposure.
Subsequently, biohazard cleaners don appropriate personal protective equipment (PPE), which may include gloves, masks, and full-body suits, to ensure their safety during the decontamination process.
Following the application of these specialised tools, all surfaces are meticulously scrubbed and disinfected to guarantee the complete eradication of harmful pathogens. Waste disposal is conducted in accordance with stringent regulations to mitigate any residual risk to the environment, highlighting the significance of comprehensive decontamination procedures in safeguarding health and safety.
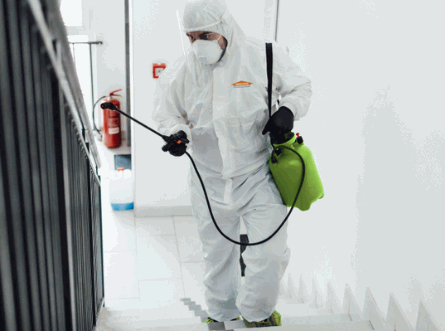
The proper utilisation of personal protective equipment (PPE) is imperative for biohazard cleaners to ensure their safety while executing high-risk cleaning tasks in contaminated areas. The importance of adequately covering all potential points of exposure cannot be overstated.
Cleaning personnel encounter various risks, making it essential to understand the different types of PPE available. Common categories of PPE include:
When selecting PPE, it is critical to consider the specific hazards present in the environment. Individuals should adhere to guidelines such as:
Effective use of PPE not only safeguards individuals but also reduces the risk of spreading infectious diseases such as COVID-19, thereby fostering a safer environment for all parties involved.

Documentation and reporting are essential components of a biohazard cleaner's responsibilities, as they provide critical records of cleaning activities and ensure compliance with health regulations.
Accurate documentation is vital in the biohazard cleaning process for several reasons. It involves the recording of key details, often referenced in professional journals, including:
By maintaining comprehensive records, biohazard cleaning professionals not only comply with legal requirements but also cultivate trust with clients and the community.
This meticulous reporting significantly contributes to transparency and accountability within the cleaning industry, ultimately playing a crucial role in upholding public health standards. It assures stakeholders that appropriate precautions were taken, thereby promoting a safe environment for all.
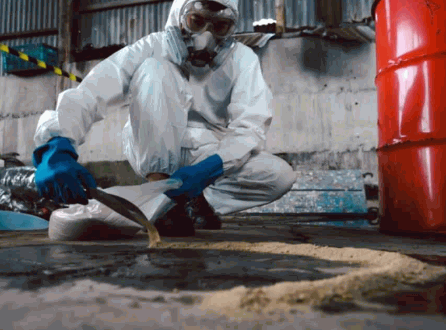
Being a biohazard cleaner involves numerous risks, including exposure to harmful substances and the potential for emotional and psychological effects arising from the nature of the work. These professionals frequently operate in environments containing hazardous materials, such as bodily fluids and industrial waste, which can present significant health hazards if appropriate safety protocols are not rigorously adhered to.
Furthermore, the emotional toll associated with trauma cleaning and managing contaminated areas may result in stress and mental fatigue, highlighting the necessity for support systems and coping strategies within this profession.
Exposure to harmful substances represents a primary risk for biohazard cleaners, necessitating a comprehensive understanding of the health risks associated with various biohazardous materials. This includes biological agents, chemical residues, and infectious pathogens that may be encountered during the cleaning process.
Biohazard cleaners frequently come across a variety of harmful substances, including:
These materials present significant health risks and necessitate the proper utilisation of Personal Protective Equipment (PPE), including gloves, masks, goggles, and protective suits. Leading companies ensure that their personnel are well-equipped to handle such hazards.
By adhering to established safety protocols, biohazard cleaners can protect themselves and minimise the risk of exposure, thereby fostering a safer working environment while effectively managing the hazards they encounter.
Physical hazards represent a significant risk for biohazard cleaners, who frequently operate in environments that may present dangers such as slips, trips, falls, and exposure to sharp objects. These professionals navigate hazardous materials and workspaces that can pose serious threats to their safety if not handled with the utmost care.
The nature of their work may involve contact with various biohazards, including:
As a result, comprehensive training in safety protocols is essential. This training equips workers to recognise these risks and implement necessary precautions, such as following guidelines from professional cleaning associations and adhering to COSHH standards:
By emphasising adherence to these protocols, biohazard cleaners can significantly reduce their risk of injury while performing critical tasks that protect public health.
The emotional and psychological impact of being a biohazard cleaner can be significant, as these professionals regularly face traumatic situations that can adversely affect their mental health, potentially resulting in feelings of anxiety, depression, or even social isolation. The harsh reality of cleaning up scenes of violence, accidents, or neglect demands not only physical resilience but also substantial emotional strength. These workers are often confronted with the stark reality of human suffering, which can understandably lead to psychological distress over time.
As these challenges accumulate, they may culminate in burnout, emphasising the necessity for biohazard cleaners to seek support and develop effective coping strategies. Available support systems may include:
The significance of mental health resources cannot be overstated. Employers can contribute by providing access to mental health programmes and fostering an open dialogue about emotional well-being within the workplace.
By establishing a supportive environment, employers can help mitigate the negative impacts of the job and cultivate a culture of care and understanding among biohazard cleaning professionals.

Pursuing a career as a biohazard cleaner entails a systematic approach that includes completing training and certification programmes, acquiring relevant experience, and applying for available positions in the field. Reputable companies offer comprehensive training and career opportunities in this critical field.
Individuals aspiring to enter this profession must engage in comprehensive education to gain a thorough understanding of biohazardous materials and associated cleaning protocols. Additionally, they must cultivate the skills necessary to operate effectively in potentially hazardous environments.
Biohazard cleaners often work in major cities and locations like London, responding to incidents that require specific handling and decontamination expertise.
Ongoing professional development and staying abreast of industry standards are essential components for achieving success in this field.
Completing training and certification programmes is a critical step for individuals aspiring to become biohazard cleaners. These programmes equip participants with the essential knowledge and skills required to handle hazardous materials safely, while also fostering a comprehensive understanding of the legal and ethical responsibilities inherent to this field. Familiarity with COSHH (Control of Substances Hazardous to Health) regulations is also emphasized to ensure safety and compliance.
The curriculum offered in these programmes typically covers a range of essential topics, ensuring that participants receive a well-rounded education. Key components include:
The significance of certification cannot be overstated, as it not only ensures compliance with health regulations but also instils confidence in clients and employers regarding a cleaner's ability to perform tasks safely and effectively.
Acquiring experience and skills is essential for biohazard cleaners, as practical involvement in real-life situations significantly enhances their capacity to manage biohazardous materials effectively.
In the cleaning industry, particularly for professionals handling biohazardous materials, practical experience is not merely advantageous; it is imperative. Participating in internships or entry-level positions provides individuals with exposure to real-world scenarios, allowing them to learn how to identify and safely manage various types of contaminants. This hands-on experience is invaluable, enabling new cleaners to develop critical competencies such as:
As these skills are refined through repeated exposure and practice, biohazard cleaners enhance their proficiency, thereby contributing positively to their professional development and the safety of the communities they serve.
Applying for job openings is a critical step in the career trajectory of a biohazard cleaner, as it enables individuals to apply their training and skills within a professional context. This process typically commences with the development of a targeted CV that effectively highlights relevant experiences, certifications, and skills essential to the biohazard cleaning field, ensuring alignment with the specific requirements detailed in the job advertisement. Crafting a standout CV not only demonstrates the applicant's proficiency but also reflects their attention to detail—a critical trait in this profession.
After refining the CV, it is imperative to prepare for interviews by conducting thorough research on the company, anticipating common interview questions, and thoughtfully considering how to articulate personal experiences that correspond with the job's requirements.
Showcasing any hands-on training or pertinent certifications can significantly enhance an individual's marketability during the interview process.
Networking is also a vital component in identifying job opportunities within the biohazard cleaning sector. Establishing connections with industry professionals through platforms such as LinkedIn or participating in relevant workshops can provide valuable insights and referrals.
Implementing these strategies will not only facilitate the job search but also substantially increase the likelihood of securing a position in this specialised industry.
Continuous updating of knowledge and skills is essential for biohazard cleaners, as the industry is in a state of constant evolution with the introduction of new cleaning chemicals, techniques, and regulations.
To effectively navigate this dynamic landscape, biohazard cleaners must actively participate in various educational opportunities. This involvement includes attending workshops, which provide practical training, and seminars that address recent advancements in safety measures and regulatory compliance. Online courses also offer invaluable flexibility for those seeking to learn at their own pace.
By leveraging these resources, professionals can enhance their expertise, ensuring they are well-prepared to manage the complexities of their work while upholding the highest standards of safety.
Hoarding can have a profound impact on an individual's life and living environment, often resulting in overwhelming circumstances that may seem unmanageable. This article examines the definition of hoarding, the underlying causes, and its classification as a mental health disorder. It addresses the significance of cleaning a hoarder's home, the associated health risks, and the necessary steps to effectively undertake the cleanup process. Additionally, the article offers insights into how to support individuals struggling with hoarding and presents strategies to prevent the issue in the future. We invite you to explore the complexities of hoarding and the pathway to recovery.

Hoarding is a complex psychological condition defined by an individual's inability to discard or part with possessions, irrespective of their actual value. This behavior frequently leads to excessive clutter within a hoarder's residence, which can create significant health hazards and emotional distress for both the individual experiencing hoarding and their loved ones.
Classified as a disorder by mental health professionals, hoarding can result in serious consequences, including structural damage, biohazards, and a chaotic living environment. Therefore, it is imperative to promote community education and understanding regarding this pervasive issue.

The causes of hoarding are complex and can be attributed to a combination of psychological, emotional, and environmental factors. Individuals with a history of anxiety disorders, depression, or trauma are particularly susceptible to developing hoarding disorder.
In many cases, the necessary emotional support is insufficient, resulting in an overwhelming need to retain items as a source of comfort or security.

Hoarding is classified as a mental health disorder, formally referred to as hoarding disorder, and is recognised by reputable institutions such as the Mayo Clinic. This disorder is characterised by persistent difficulty in discarding or parting with possessions, which leads to significant distress and impairment in daily functioning. It is often associated with conditions such as obsessive-compulsive disorder (OCD) and anxiety disorders.
Hoarding disorder involves a profound emotional attachment to items, resulting in the accumulation of possessions to the extent that living spaces become unusable. According to the Diagnostic and Statistical Manual of Mental Disorders (DSM-5), the criteria for diagnosis include not only the inability to part with items but also the resulting clutter that considerably impacts one's life.
It is essential to understand hoarding as more than merely a behaviour; rather, it is a complex interplay of emotional, cognitive, and environmental factors that is crucial for effective intervention and support.

Cleaning a hoarder's house is of paramount importance for several reasons, primarily to mitigate health hazards, ensure a safe living environment, and restore emotional well-being.
The excessive clutter found in such homes can pose significant physical health risks, including fire hazards, structural damage, and exposure to biohazards. Therefore, it is essential to address these issues through effective waste removal and comprehensive deep cleaning processes.
Explore further: How To Remove Black Mould From Window

Living in a hoarder’s residence presents numerous health risks, primarily due to the excessive clutter that can harbour biohazards, attract rodents, and create fire hazards. The accumulation of debris and refuse can obstruct pathways and potentially lead to structural damage, making it essential to address these concerns through a systematic cleaning process to facilitate a healthier living environment.
The presence of pervasive filth invites harmful bacteria and pests, and it can also significantly contribute to various physical injuries. Individuals manoeuvring through confined and cluttered spaces may trip over discarded items, resulting in falls and other accidents.
Along with the physical safety concerns, residing in such environments can have detrimental effects on mental health, as the overwhelming chaos often exacerbates anxiety and depression. The psychological toll may further intertwine with feelings of isolation, underscoring the importance of identifying and rectifying these risks through professional intervention or support.
Addressing these issues not only enhances health but also aids in restoring a sense of normality and well-being.

The duration necessary to clean a hoarder's residence can vary considerably based on multiple factors, including the amount of clutter, the unique needs of the individual involved, and the resources available, such as the assistance of a professional cleaning team.
Generally, the cleaning process may take anywhere from a few days to several weeks, depending on the severity of the hoarding situation and the level of emotional support required throughout the process.

Several factors can significantly influence the duration required to clean a hoarder's house, including the volume of clutter present, the emotional readiness of the individual, and the availability of organisational services or rubbish removal assistance. Additionally, the provision of emotional support during the cleaning process can be pivotal in determining the efficiency and effectiveness of the clean-up.
Key elements that impact the timeline include:
Ultimately, understanding these factors is crucial in developing a realistic plan for a successful and supportive cleaning experience.

Cleaning a hoarder's house necessitates several essential steps that ensure a comprehensive and considerate approach to decluttering and organising the environment.
This process begins with a thorough assessment of the situation and is followed by the implementation of a meticulously crafted cleaning checklist. Often, the involvement of a professional cleaning team is required, as well as the provision of emotional support for the individual experiencing hoarding tendencies, to facilitate their navigation through this challenging transition.
Assessing the situation is the initial and essential step in the process of cleaning a hoarder's residence. This involves a thorough inspection of the premises to comprehend the extent of the clutter and its impact on the living environment. This stage is critical for identifying potential health hazards, emotional triggers, and the necessary resources required for an effective clean-up.
During this crucial phase, a careful evaluation of various areas within the home is essential. Key factors to consider include:
By conducting this comprehensive assessment, one can develop an effective clean-up plan that not only addresses the physical debris but also respects the emotional complexities involved, ultimately leading to a healthier living environment and a fresh start.
Developing a structured cleaning plan is essential for effectively addressing a hoarder’s residence, as it delineates clear steps for decluttering, organising, and managing the emotional sensitivities associated with this process. A well-defined plan not only streamlines the cleaning endeavour but also provides reassurance to the individual affected by hoarding, thereby fostering a safer and more manageable environment. Incorporating cleaning tips and engaging a professional team can significantly enhance the process.
To ensure the success of this undertaking, it is imperative to incorporate timelines, assign specific tasks, and clarify the roles of professional cleaning teams. Establishing a realistic timeline helps maintain project momentum, allowing for the setting of milestones at each phase of the cleaning process.
A comprehensive plan may typically include:
Assigning designated roles to cleaning teams ensures that tasks such as sorting, cleaning, and organising are managed by skilled individuals, allowing the person affected by hoarding to feel supported rather than overwhelmed. Ultimately, an effective cleaning plan that integrates these components fosters a transformative experience for the individual, leading to lasting change.

Sorting and organising items in a hoarder's home is a critical process that requires sensitivity and careful consideration, especially when addressing possessions that hold sentimental value for the individual involved.
This endeavour can often be overwhelming, as treasured items may evoke strong memories and emotions. Therefore, it is imperative to approach the task with compassion and understanding.
When undertaking the organisation, it is advisable to employ strategies that promote a balanced approach to decision-making. Involving the individual with hoarding tendencies in the categorisation process can give the power to them and facilitate emotional healing.
By prioritising emotional well-being alongside the practical aspects of organisation, this sensitive approach can cultivate a healthier and more supportive environment for both the individual and their family members. Additionally, establishing storage areas can further aid in maintaining order.
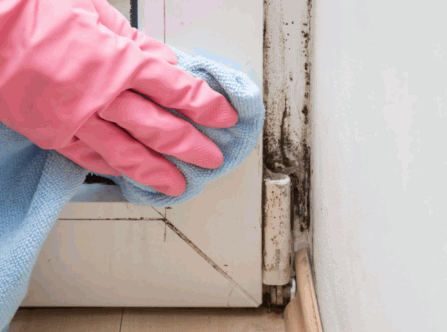
Cleaning and disinfecting a hoarder’s residence is a critical step that follows the sorting and organising process, as it effectively eliminates health hazards such as mould, biohazards, and pests. The use of appropriate cleaning supplies and equipment is essential to ensure that the environment is safe and hygienic, necessitating that professional cleaning teams adhere to established cleaning protocols. Utilising cleaning solutions specifically designed for sanitization is crucial in mitigating fire hazards and other risks.
The process commences with the collection of the necessary cleaning supplies, which include heavy-duty rubbish bags, protective gloves, face masks, and a variety of disinfectants. It is imperative to wear protective gear to mitigate exposure to harmful substances. Suitable cleaning agents are employed not only to remove dirt but also to eradicate germs and allergens. Employing techniques such as working from the top down and following a systematic approach significantly enhances both efficiency and effectiveness.
A thorough cleanup greatly contributes to the overall well-being of the inhabitants and can prevent potential future infestations or health complications.
Removing unwanted items from a hoarder's residence is a critical step in the cleaning process, as it directly contributes to decluttering and the creation of a more functional living environment.
When addressing such a significant undertaking, it is essential to consider various strategies that facilitate an efficient and stress-free experience. Engaging professional junk removal services not only accelerates the process but also ensures that items are disposed of in a responsible manner. Many of these services emphasize environmental sustainability by providing eco-friendly disposal options, which include recycling and proper waste management practices. These efforts contribute to environmental responsibility by reducing the volume of junk and garbage.
Taking the time to categorise items can greatly simplify the removal process:
By implementing these best practices, individuals can promote a cleaner environment while making a positive impact on the community and the ecosystem.

Repairing and restoring a space after the cleaning of a hoarder's residence is essential to address any structural damage caused by prolonged clutter and neglect, thereby ensuring that the environment is safe and habitable. This process may involve repairing walls, floors, and plumbing, thereby creating a renewed sense of hope and stability for the affected individual.
Effective repairs are critical to mitigating numerous common issues encountered in these environments, including mould growth, pest infestations, and compromised structural integrity. Addressing these challenges not only aids in restoring the functionality of the space but also prevents further damage in the future.
By taking these proactive steps, it is possible to create a healthy atmosphere that promotes healing and recovery, ultimately supporting the individual in moving forward in a positive manner.
Assisting a hoarder in organising and cleaning their residence can be a challenging yet rewarding undertaking that necessitates a sensitive approach and a solid foundation of emotional support. Engaging in a collaborative hoarding intervention with Mental health professionals can greatly benefit the process.
It is essential to engage with the individual with empathy and understanding, and to enlist a team of professionals if needed, in order to effectively navigate the complexities associated with their situation.
Being understanding and non-judgemental is essential when assisting a hoarder, as it cultivates a safe environment conducive to open communication and emotional support throughout the cleaning process. A compassionate approach ensures that the individual feels valued and less isolated, ultimately fostering a more positive atmosphere for collaboration.
When supporting individuals who struggle with hoarding, it is crucial to recognise the profound emotional connections they have to their possessions. By actively listening to their feelings and concerns, loved ones can effectively bridge the gap between understanding and action. Empathy and communication play a significant role in the healing journey. For example, validating their fears regarding the disposal of items or acknowledging the sentimental value of possessions can facilitate constructive discussions.
Establishing a step-by-step approach to sorting through belongings can help mitigate feelings of overwhelm. Celebrating small victories reinforces a sense of accomplishment and serves to motivate continued progress.
Providing support and encouragement is essential when assisting an individual with hoarding tendencies in their cleaning journey, as this fosters confidence and motivation to address the overwhelming clutter. Positive reinforcement can significantly influence their perception of the cleaning process and their capacity for change.
To cultivate an environment where progress is acknowledged and celebrated, family members and friends should actively engage with the individual by employing affirming language and recognising even small achievements. Positive reinforcement may take various forms, including verbal praise, tangible rewards, or simple gestures such as a supportive hug. Enlisting the assistance of Mental health professionals can further support the emotional impact of the process.
The following strategies can enhance this supportive approach:
By integrating these strategies into their journey, the individual is more likely to experience a shift in mindset, thereby increasing the likelihood of sustaining their efforts over time.
Seeking professional assistance is often essential when addressing the challenges associated with hoarding and hoarding disorder, as trained experts can offer the necessary resources, emotional support, and cleaning services required to navigate its complexities. Organizations like the Mayo Clinic provide valuable insights into treatment options.
Engaging with professionals presents numerous advantages that are vital for both the individual affected and their families. Among these benefits, professional cleaning services play a crucial role in alleviating physical clutter and restoring a sense of normality in the living environment, thereby creating a healthier space. Concurrently, mental health support addresses the emotional and psychological aspects of hoarding, leading to more sustainable outcomes. Many individuals discover that ongoing therapy give the power to them to overcome negative patterns and cultivate healthier habits, thereby enhancing the effectiveness of their recovery.
The integration of these efforts ultimately enhances overall well-being and establishes a pathway to lasting recovery.
Preventing hoarding in the future necessitates a proactive approach that emphasises effective organisation, emotional support, and the identification of underlying issues such as Hoarding disorder that may contribute to the disorder.
Implementing strategies such as therapy and participation in support groups can enable individuals to cultivate healthier habits and coping mechanisms with support from organizations thereby significantly reducing the risk of hoarding behaviour.
Addressing underlying issues is essential for the prevention of hoarding, as unresolved emotional or psychological challenges frequently contribute to the disorder. Engaging in therapy and seeking emotional support from professionals knowledgeable about biohazards such as animal waste, human waste, and mould can assist individuals in processing these challenges and developing healthier coping strategies.
It is particularly important to recognise that various factors can contribute to this condition, which may include:
Therapeutic interventions, such as cognitive-behavioural therapy, can play a pivotal role in assisting those affected in understanding and confronting the root causes of their hoarding tendencies. Collaborating with junk removal services can also support decluttering efforts.
Practising effective organisational and cleaning habits is essential in preventing hoarding behaviour, as these skills enable individuals to maintain a tidy and manageable living environment.
Establishing routines for decluttering and organising spaces can significantly decrease the likelihood of clutter accumulation while promoting emotional well-being. It is crucial to develop a structured plan that incorporates small, achievable tasks into daily life. For example, dedicating just 15 minutes each day to sorting through items can lead to substantial progress over time.
By committing to these consistent habits, individuals not only cultivate a cleaner living space but also enhance their overall mental clarity and peace of mind.
Seeking therapy or participating in support groups can be highly beneficial for individuals at risk of hoarding, as these resources create a safe environment for discussing challenges and receiving emotional support.
Engagement with professionals or peer groups can facilitate personal growth and the development of healthy coping strategies. These environments not only provide validation but also encourage individuals to share their experiences, thereby fostering a sense of community.
Many individuals have found that participating in structured therapy sessions leads to significant personal breakthroughs, enabling them to recognize the underlying emotions associated with their behaviours. Support groups, in particular, can promote accountability and motivation, as members learn from each other’s experiences.
Effective interventions, such as cognitive behavioural therapy (CBT), have demonstrated success in reframing negative patterns related to accumulation and attachment. Numerous success stories highlight transformations in which individuals have effectively decluttered their lives and established sustainable habits.
Collectively, these resources can illuminate pathways toward recovery, equipping individuals with both the tools and support necessary to overcome their challenges.

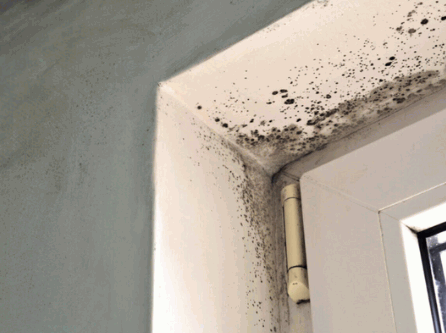
Black mould is a prevalent yet frequently overlooked issue that can adversely affect the health of both homes and their occupants. Often discovered on windows and window frames, black mould flourishes in damp environments, often exacerbated by window condensation and poorly fitted frames, presenting significant health risks if not properly managed. This article will examine what black mould is, its underlying causes, and methods for identification. Additionally, it will provide effective removal techniques, preventative measures to prevent mould, and advice on when to seek professional assistance. By gaining a comprehensive understanding of black mould and addressing it proactively, individuals can safeguard their living spaces and promote their overall health.
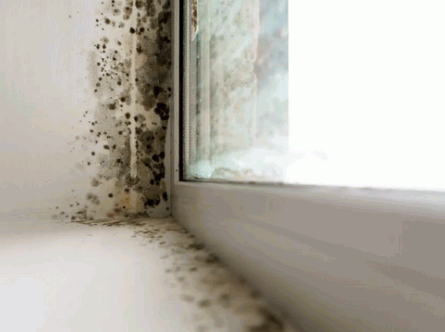
Black mould, scientifically referred to as Stachybotrys chartarum, is a type of fungus that flourishes in damp environments and is frequently found on windows and window frames, particularly in areas with insufficient ventilation, such as poorly fitted frames.
This mould typically manifests as patches of dark green or black fuzz and is well known for releasing spores into the air, which can lead to a range of health issues.
It is vital for homeowners and tenants to understand the nature of black mould and its potential impacts, especially in areas where moisture levels are high, such as kitchens and bathrooms, which are prone to window condensation.
The presence of black mould on windows is primarily attributed to excessive condensation, which arises when warm, moist air from within a dwelling comes into contact with the cooler surfaces of window panes, particularly in poorly fitted timber or uPVC frames.
This condensation establishes an environment that is conducive to mould growth, especially when moisture levels are not effectively managed through adequate ventilation. Additional contributing factors include insufficient insulation and elevated indoor humidity, often intensified by everyday activities such as cooking and bathing, which necessitate the use of dehumidifiers and good ventilation systems.
Common locations for the presence of black mould on windows include areas with elevated humidity levels, such as kitchens and bathrooms. The steam generated from cooking and bathing can lead to excessive moisture accumulation, making it crucial to maintain good ventilation. Windows that exhibit poor insulation or are situated in shaded areas are also vulnerable to mould growth, particularly along the window frames where condensation tends to collect.
The correlation between room usage and moisture levels is significant. For instance, bedrooms that lack proper ventilation may encounter mould issues, especially if occupants frequently keep the curtains drawn.
These areas create an optimal environment for mould spores to thrive, particularly in conjunction with temperatures that promote growth, increasing the potential for health problems. Therefore, regular maintenance and proactive measures are crucial in preventing moisture accumulation, which serves as the primary catalyst for mould development in these common spaces.
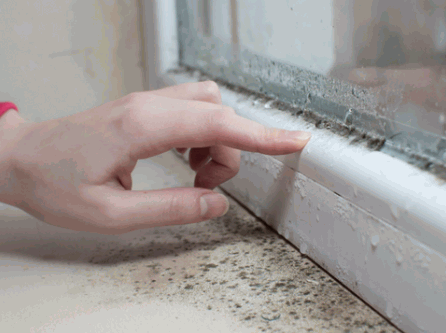
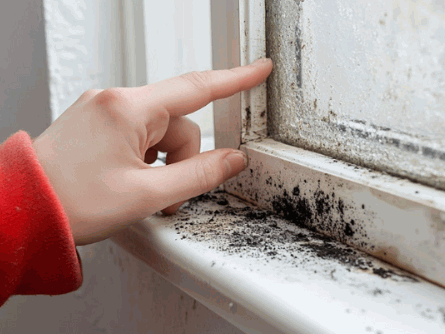
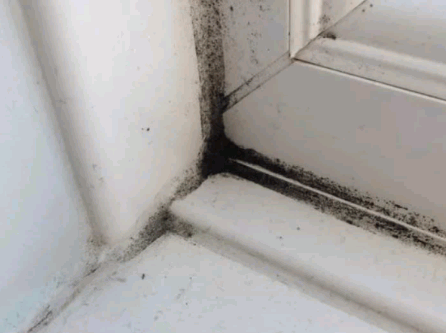
Identifying black mould on windows requires a systematic approach to observe specific indicators, such as dark spots or patches on window frames, sills, seals, and areas around silicone sealant. This type of mould often presents a fuzzy texture and may emit a musty odour, signifying the presence of mould spores in the air, which can adversely affect air quality. Conducting regular inspections, particularly in areas susceptible to moisture, is crucial for early detection and prevention of further spread.
To effectively determine the presence of black mould, homeowners should also consider the following factors and mould removal tips:
Along with recognising these signs, maintaining adequate ventilation, using dehumidifiers, and reducing humidity levels can significantly mitigate the risk of mould proliferation, thereby promoting a healthier living environment.
Uncover more: What Is A Biohazard Cleaner
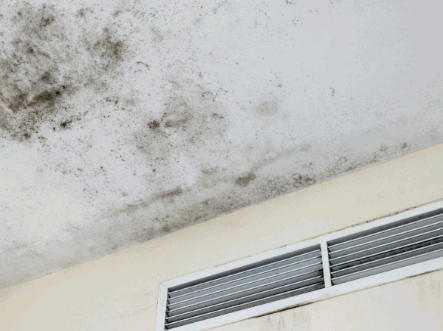
The health risks associated with exposure to black mould can be substantial, especially for individuals with pre-existing respiratory conditions, allergies, or compromised immune systems.
Inhalation of mould spores may result in various health complications, including respiratory disorders, skin irritation, and, in severe cases, toxic effects. Mould can lead to serious health problems if not handled promptly. Additionally, prolonged exposure to black mould can adversely affect indoor air quality, thereby creating an unhealthy living environment.
Black mould has a substantial impact on indoor air quality by releasing spores into the environment, which can be inhaled and lead to a variety of health issues. The presence of mould increases airborne allergens, making it challenging for individuals with respiratory conditions to breathe comfortably. Furthermore, the persistent moisture levels and lack of proper window sealant commonly associated with mould growth can result in structural damage and unpleasant odours, thereby further deteriorating air quality.
These microscopic spores, when inhaled, can trigger allergic reactions and exacerbate conditions such as asthma or bronchitis. The relationship between mould and moisture is critical; areas with high humidity create an optimal environment for mould proliferation, which consequently heightens health risks.
It is essential for homeowners to manage humidity levels effectively, employ baking soda and white vinegar as natural solutions, and address any water leaks promptly, as neglecting these factors can lead to a detrimental cycle:
Ultimately, the impact of black mould on indoor air quality extends beyond mere unpleasant odours; it poses a serious threat to health and well-being that must not be underestimated.
Black mould can indeed result in serious health concerns, particularly respiratory issues, skin irritations, and allergic reactions.
Exposure to black mould presents significant health risks, especially for vulnerable populations, including children, the elderly, and individuals with pre-existing health conditions. Initial symptoms may be mild, but over time, individuals may experience more severe health consequences, which can include:
Prolonged exposure to black mould may lead to serious complications such as chronic respiratory diseases, compromised immune systems, and, in some instances, neurological effects. Products like HG Mould Spray can be considered for effective treatment. Prompt and effective intervention is essential, as it can alleviate immediate discomfort and substantially decrease the risk of long-term health issues.
The removal of black mould from windows is essential for maintaining a healthy indoor environment. This process can be effectively accomplished using a variety of cleaning solutions, including a mixture of bleach and water, as well as natural alternatives such as vinegar and baking soda.
It is imperative to ensure that window frames are meticulously cleaned and dried, any necessary window repair is carried out, and that the ventilation system is operating effectively to prevent the recurrence of mould growth.
To effectively eliminate black mould, it is essential to have several supplies on hand, including cleaning solutions such as bleach and water, baking soda, and white vinegar, as well as protective gear, such as gloves and masks. Additionally, tools like scrubbing brushes, sponges, and microfiber cloths are critical for thorough cleaning.
To ensure a comprehensive approach to mould removal, it is imperative to gather the following supplies:
Having these supplies prepared not only streamlines the process but also enhances safety and effectiveness during mould remediation. Consider the type of window frames, such as timber frames or uPVC, when selecting cleaning agents.

Removing black mould from windows necessitates a systematic approach. Begin by preparing a suitable cleaning solution, which may consist of a mixture of bleach and water or a natural alternative using vinegar or bicarbonate of soda. It is crucial to ensure adequate ventilation in the room to minimise the inhalation of spores. Subsequently, scrub the affected areas thoroughly before rinsing and drying the window frames.
Before initiating this task, it is essential to gather all necessary supplies for the removal process. These supplies may include:
Once all items are assembled, it is advisable to don protective gear to safeguard against harmful particles and chemicals.
When applying the cleaning solution, ensure that all visible mould spots are covered thoroughly. Furthermore, post-cleaning maintenance is vital; regularly inspect windows for moisture build-up and ensure proper sealing to prevent future occurrences of black mould.
Preventing black mould growth on windows is crucial for maintaining a healthy living environment and begins with effective moisture control through proper ventilation. Ensuring that windows, whether they are timber frames or uPVC, are adequately sealed and considering the implementation of dehumidifiers can substantially decrease the likelihood of mould formation, particularly in areas susceptible to dampness, such as kitchens and bathrooms.
To effectively reduce moisture levels in the home, several strategies can be employed, including the use of dehumidifiers to extract excess humidity from the air and ensure proper ventilation in areas prone to moisture accumulation. This can be achieved by opening windows, using extractor fans during cooking or bathing, and sealing any leaks that may contribute to dampness. These measures are essential for preventing health issues associated with mould growth, and effectively removing mould from various surfaces.
Along with these methods, homeowners should consider implementing moisture absorbers, such as silica gel or activated charcoal, which can help maintain dryness in smaller spaces. Regular inspection and cleaning of gutters can prevent water buildup and subsequently reduce indoor humidity. For individuals residing in more humid climates, investing in a high-quality air conditioning system can also be beneficial, as it efficiently lowers moisture levels.
To further enhance moisture control efforts, it is important to maintain a consistent indoor temperature, as warmer air retains more moisture than cooler air.
Ultimately, by addressing these various factors, one can create a more comfortable living environment while minimising the risk of mould development.
Proper ventilation of a room is essential in preventing the growth of black mould. This involves facilitating the circulation of fresh air and reducing humidity levels. Effective strategies include opening windows when weather conditions allow, utilising exhaust fans in kitchens and bathrooms, and ensuring that ventilation systems are functioning optimally to disperse moisture.
Along with these fundamental practices, the incorporation of several additional strategies can significantly enhance air quality:
By implementing these additional measures, individuals can greatly improve airflow and moisture control, thereby minimising the risk of mould growth and promoting a healthier living environment.
If black mould is discovered covering a substantial area, or if individuals within the home experience significant health issues related to mould exposure, it is recommended to seek professional assistance for mould removal. Professionals are equipped to assess the extent of the infestation, address underlying moisture problems, and ensure thorough cleaning to prevent future growth.
In cases where a considerable presence of mould suggests that it has permeated walls or ceilings, immediate attention is warranted. Left unaddressed, these infestations can lead to a range of serious health concerns, including respiratory issues, allergic reactions, and other chronic conditions that may impact all residents, particularly vulnerable populations such as children and the elderly.
Should respiratory problems such as asthma or bronchitis begin to manifest, or if visible signs of mould proliferation are noted in concealed areas, it becomes increasingly imperative to engage qualified specialists. Their expertise not only ensures effective removal but also identifies and rectifies environmental factors that contribute to persistent issues.
Therefore, for health safety and long-term peace of mind, contacting mould remediation professionals is essential.
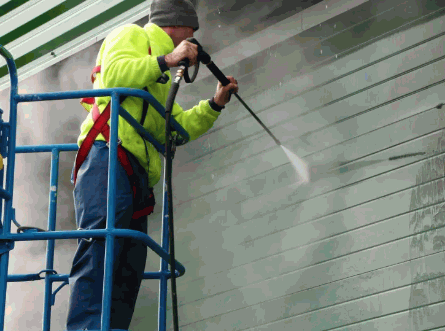
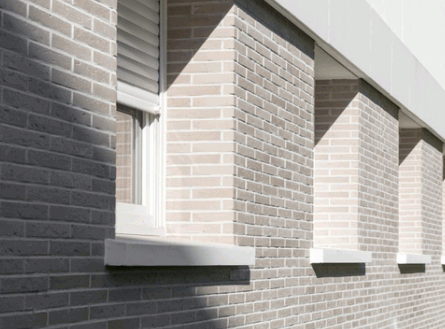
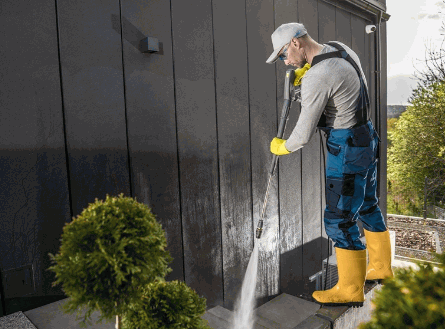
Cladding is essential for both the protection and aesthetic enhancement of buildings; however, it requires regular maintenance to ensure optimal appearance. This guide examines the concept of cladding, the importance of maintaining its cleanliness, and the various types available, including timber and stone. It offers effective cleaning procedures and recommendations tailored to different cladding materials. Whether you are a homeowner or a property manager, this guide provides the necessary knowledge to maintain your cladding effectively.

Cladding is the process of applying one material over another to create a protective layer that also enhances the aesthetic appeal of buildings. This architectural technique is widely employed to improve the durability of structures while providing insulation and resistance to weather elements.
A diverse range of cladding materials is available, including composite cladding, wood cladding, and PVC cladding, each serving specific functions based on environmental conditions. Composite materials are especially preferred due to their low maintenance requirements and environmentally friendly characteristics, positioning them as an ideal choice for contemporary buildings in the UK and beyond.

Cleaning cladding is a critical component in preserving the appearance and longevity of a building's exterior. Over time, exposure to environmental elements can result in the accumulation of dirt, grime, stubborn stains, mould, and mildew. This not only diminishes the visual appeal of the structure but may also pose a risk of structural damage if left unaddressed.
Regular cleaning enhances overall kerb appeal and complies with maintenance standards, ensuring that cladding materials, especially eco-friendly options such as composite cladding, remain in optimal condition for years to come.
There are various types of cladding available, each providing distinct benefits and aesthetic qualities that accommodate diverse architectural styles and environments.
Timber cladding, renowned for its natural appearance, is frequently used in residential homes. In contrast, vinyl cladding is preferred for its durability and minimal maintenance requirements.
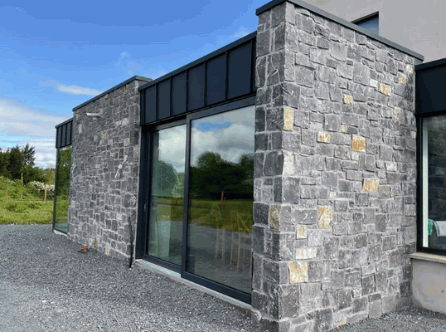
Metal cladding offers a contemporary aesthetic along with long-lasting protection, while brick and stone cladding delivers timeless elegance and substantial structural support.
A comprehensive understanding of the different cladding types enables homeowners and builders to make informed decisions tailored to their specific needs, climate considerations, and design preferences.
Timber cladding is widely regarded for its natural aesthetic appeal and versatility in design, making it suitable for various architectural styles. It imparts warmth and character to buildings and is frequently preferred for eco-friendly construction projects due to its renewable properties.
While the visual appeal of timber cladding is evident, there are both benefits and drawbacks that potential buyers should carefully consider. On the positive side, timber cladding offers excellent insulation, can enhance property value, and contributes to lower carbon emissions when compared to synthetic alternatives. Notable types, such as cedar and larch, are recognised for their durability and resistance to decay, which affect not only their aesthetic qualities but also their cleaning and maintenance requirements. For example, cedar may necessitate less frequent maintenance due to its natural oils, whereas larch may require periodic treatments to preserve its appearance.
Benefits:
Drawbacks:
In conclusion, the decision to select timber cladding requires careful consideration of aesthetics, sustainability, and maintenance obligations.

Vinyl cladding is well-regarded for its durability and low maintenance requirements, making it an ideal choice for homeowners seeking an affordable yet effective exterior solution. It is resistant to fading, peeling, and cracking, ensuring long-lasting beauty without the necessity for frequent upkeep.
Furthermore, the cost-effectiveness of vinyl cladding is noteworthy. Unlike traditional materials that often entail higher installation and maintenance costs, vinyl offers an economical alternative, providing excellent value over time.
Homeowners also appreciate the ease of cleaning associated with this material; typically, a simple rinse with a garden hose is sufficient to remove dirt and grime. For more stubborn stains, a mixture of warm water and mild soap is recommended.
This durability allows homeowners to maintain a beautifully presented exterior with minimal effort, thereby enhancing both aesthetic appeal and property value.

Metal cladding provides a sleek and modern design that not only enhances the aesthetic appeal of a building but also offers exceptional weather resistance and insulation properties. This type of cladding is particularly effective in urban settings, where durability and a contemporary appearance are of paramount importance.
Plus its striking visual appeal, metal cladding presents significant advantages in terms of strength and longevity. Its resilience to harsh weather conditions ensures that buildings remain protected from the elements, thereby minimising the need for frequent repairs.
The variety of available finishes allows architects and builders to explore options such as:
These elements can complement any architectural style.
To maintain metal cladding in optimal condition, periodic cleaning is recommended. This typically involves:
Overall, metal cladding offers a stylish and robust solution for contemporary buildings.

Brick cladding offers a traditional aesthetic that significantly enhances the character of any building while also contributing to thermal efficiency and structural integrity. Its inherent strength and durability make it a preferred choice for both residential and commercial properties.
Beyond its visual appeal, the thermal advantages of brick cladding are substantial; it effectively retains heat during colder months and helps maintain cooler interiors in the summer, resulting in improved energy efficiency and reduced heating costs over time.
Property owners will value the longevity of brick cladding, which can withstand harsh weather conditions while requiring minimal maintenance. To preserve its appeal and functionality, specific cleaning methods should be employed:
Despite its resilience, brick surfaces may encounter challenges such as water staining or efflorescence due to moisture absorption. Addressing these issues promptly is essential to maintaining the beauty and durability of the cladding, ensuring it continues to be a hallmark of architectural elegance.
Stone cladding is widely recognised for its natural beauty and durability, offering an elegant and timeless façade that enhances the visual appeal of buildings. Its robust nature renders it suitable for a variety of climates; however, it necessitates specific maintenance and cleaning considerations.
Plus its striking aesthetic, stone cladding provides significant structural advantages, imparting a sense of permanence and stability to buildings. This material serves not only as a protective outer layer but also contributes to energy efficiency by providing insulation. To maintain its visual charm and functional integrity, regular cleaning is of utmost importance.
Appropriate cleaning agents must be identified to prevent damage to the stone surface, making it prudent to consult a professional when deep cleaning is necessary.
Cleaning cladding requires a systematic approach to effectively remove dirt, grime, stubborn stains, and biological growth, such as mould, mildew, algae, and bacteria. The process typically begins with the preparation of the area, ensuring that all necessary tools and cleaning agents are readily available.
This includes warm soapy water and either a soft brush or a pressure washer for more intensive cleaning. This approach is especially effective for cleaning composite cladding materials, including stain-resistant composites, which benefit from high-quality oxygen and eco-friendly cleaning choices. Adopting this methodical approach is essential for preserving the integrity and aesthetic appeal of the cladding while thoroughly addressing any staining or environmental damage.
Preparing the area for cleaning is a critical first step that entails establishing a safe and organised workspace. This process may involve relocating furniture away from the cladding and applying protective coverings to surfaces that could be adversely affected by cleaning agents or water.
Plus these initial tasks, it is essential to assess the cleaning products that will be utilised, prioritising eco-friendly options whenever feasible to protect the environment and the surrounding ecosystem.
Ahead of commencing the cleaning process, it is advisable to ensure the following:
By implementing these precautionary measures, one can enhance the efficiency of the cleaning process while maintaining a focus on safety for both individuals and the environment.
Selecting the appropriate cleaning solution is crucial for effectively addressing stains and ensuring the durability of cladding materials. Options such as sodium percarbonate and other eco-friendly agents offer powerful cleaning capabilities without detrimental effects on the environment.
In the context of cladding maintenance, various cleaning solutions are available, each designed to address specific stains and grime accumulation.
Each type of cleaner not only addresses specific challenges but also enhances the longevity and aesthetic appeal of the cladding.
Once the appropriate cleaning solution has been selected, the subsequent step involves meticulously scrubbing the cladding to eliminate accumulated dirt, grime, and stains. This is especially important for composite decking and exterior cladding, ensuring the service life and durability of the materials. It is advisable to use a soft brush to prevent damage to the cladding surface while effectively dislodging persistent grime.
At this stage, it is essential to employ the correct techniques and tools to achieve optimal results. Begin with gentle, circular motions to avoid scratching the surface, ensuring comprehensive coverage of the cladding. For more challenging stains, consider utilising a nylon-bristled brush or a pressure washer set to low pressure, while maintaining a distance of at least two feet from the surface.
It is imperative to rinse thoroughly after scrubbing to remove all residues and prevent additional staining. Regular maintenance can significantly reduce the time and effort required for cleaning in the long term.
After thoroughly scrubbing, it is imperative to rinse off the cleaning solution completely to prevent any residue from causing damage to the cladding materials. Using a pressure washer can be particularly effective at this stage, ensuring that all remnants of cleaning agents are effectively removed from the surface.
During the rinsing process, it is essential to direct the water stream evenly across the entire area, allowing the pressure to dislodge particles that may be lodged in crevices. Ensuring a complete rinse not only eliminates potential stains caused by drying cleaning agents but also helps to protect the integrity of the material itself. It is advisable to avoid concentrating on a single spot for an extended period, as this may result in unintended damage or discolouration.
This meticulous attention to detail during the rinsing process not only enhances the visual appeal but also significantly extends the lifespan of the cladding materials.
Look into: Can You Pressure Wash A Rug
The final step in the cleaning process involves thoroughly drying the cladding to prevent moisture build-up, which can lead to complications such as mould, mildew growth, and viruses. This can be accomplished through natural air drying or by utilising fans to expedite the drying process.
Proper drying techniques are essential for maintaining both the longevity and aesthetic appeal of the cladding. Ensuring that moisture is effectively eliminated not only enhances durability but also prevents potential structural damage. When moisture is permitted to persist, it can create an environment conducive to the proliferation of harmful organisms, ultimately compromising the integrity of the material.
Given these considerations, it is paramount to avoid moisture retention to preserve the beauty and functionality of the cladding. This is particularly important for preventing long-term damage that may arise from neglecting the drying process.
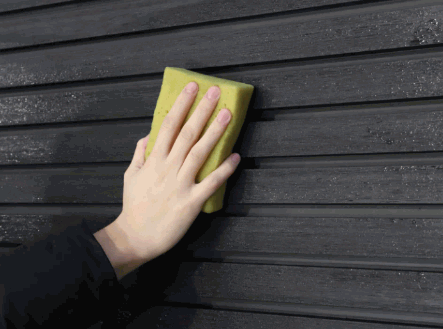
Cleaning various types of cladding necessitates specialised approaches for each material to achieve effective results without inflicting damage. For example, the cleaning of timber cladding may require the use of natural cleaning agents to maintain its finish, whereas vinyl cladding could benefit from more robust cleaning solutions designed to address stubborn stains.
A thorough understanding of the distinct properties associated with each cladding type enables both homeowners and professionals to attain optimal cleaning results.
Cleaning timber cladding necessitates a careful selection of cleaning agents to preserve its natural beauty and structural integrity.
The choice of appropriate products is essential, as certain chemicals can adversely affect the wood, compromising both its appearance and structural soundness. The cleaning methods employed are equally important. It is advisable to adopt a systematic approach that includes the following steps:
By following these methods, one can not only maintain the aesthetic appeal of timber cladding but also enhance its durability and lifespan.

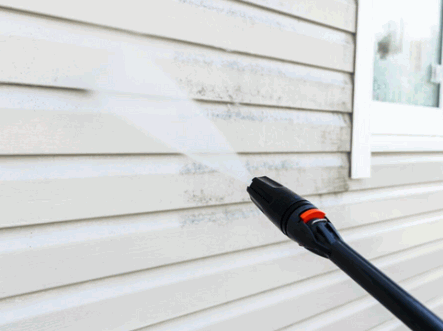
When cleaning vinyl cladding, the use of a pressure washer can be highly effective due to the material's durability and resistance to various cleaning agents. This method efficiently removes stubborn stains and dirt, ensuring that the cladding retains its original appearance.
By employing this approach, homeowners can benefit from a comprehensive cleaning process that saves considerable time and effort, particularly when addressing large exterior surfaces. Pressure washing not only enhances the aesthetic appeal of the cladding but also extends its lifespan by preventing the accumulation of mould and mildew.
When selecting cleaning solutions, it is advisable to consider those specifically formulated for vinyl, such as:
These targeted products work effectively in conjunction with pressure washers, allowing for optimal cleaning without compromising the integrity of the material.
Cleaning metal cladding is crucial not only for aesthetic appeal but also for rust prevention and the overall maintenance of its condition. Utilising high-quality cleaners specifically formulated for metal surfaces can effectively eliminate dirt and grime without compromising the finish.
Incorporating a regular cleaning schedule into the maintenance routine can significantly enhance the lifespan of metal cladding. The use of pH-balanced solutions is essential, as they help mitigate the risk of corrosion while promoting a pristine appearance. It is advisable to commence the cleaning process by rinsing the surface with water to remove loose debris. Subsequently, applying an appropriate cleaner with a soft cloth or sponge can yield excellent results.
Periodic inspections of the cladding for signs of rust or wear will facilitate timely intervention, thereby preserving both the integrity and aesthetics of the metal.
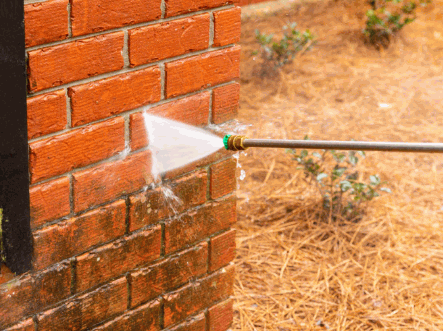
Cleaning brick cladding necessitates careful consideration to prevent water staining and potential damage to the mortar joints. While a pressure washer can be an effective tool for this task, it must be used with caution to ensure that water does not infiltrate and compromise the structural integrity of the brickwork. Additionally, be mindful of mould and mildew, which can develop if moisture is not adequately managed.
To effectively preserve both the aesthetic and structural integrity of brick exteriors, homeowners should implement a systematic approach to cleaning. Proper rinsing is essential in this process, as it aids in the removal of dirt and debris without leaving behind any cleaning solutions that could lead to discolouration.
The following guidelines should be observed:
By adhering to these recommendations, homeowners can maintain their brick cladding in optimal condition, thereby safeguarding it against potential water damage.
When cleaning stone cladding, it is imperative to employ gentle cleaning methods to preserve the natural beauty and integrity of the stones. Using soft brushes and eco-friendly cleaning agents can effectively remove dirt without causing abrasion or damage.
To maintain the aesthetics and longevity of stone surfaces, it is critical to prioritize moisture management. Excess moisture can lead to discolouration and potentially result in structural issues over time. The following practices are recommended:
By integrating these techniques, one can significantly enhance the resilience of stone cladding, ensuring that it remains visually appealing and structurally sound for years to come.

Pressure washing is a widely utilised cleaning method known for its ability to restore various surfaces. However, when considering its application on rugs, the question of safety arises. This article examines the intricacies of pressure washing rugs, encompassing the various types of rugs, the associated risks, and the recommended safety measures for this cleaning technique. Additionally, it addresses alternative cleaning methods and provides guidance on maintaining rugs to ensure their enduring beauty. Engage with this content to discover effective strategies for preserving the appearance of your rugs.

Pressure washing is an exceptionally effective cleaning technique that employs a pressure washer to remove dirt, grime, and stains from various surfaces. This method serves as an ideal solution for maintaining the cleanliness of outdoor mats and high-traffic areas.
It incorporates the use of specialised cleaning solutions to enhance the cleaning process, ensuring comprehensive dirt removal while preserving the integrity of outdoor materials. This approach is particularly favoured by homeowners and cleaning professionals seeking efficient and timely results, especially in the maintenance and care of mats.
Learn more: What Is Power Washing

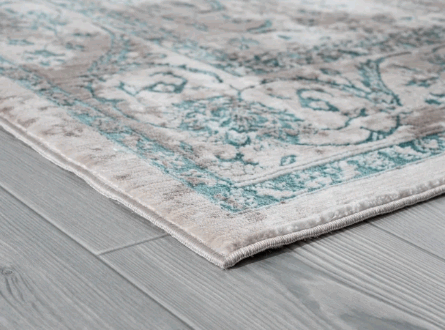
Rugs are available in a variety of types, each designed to meet specific aesthetic and functional requirements. These include:
Natural fibre rugs, crafted from materials such as wool and cotton, are recognised for their eco-friendliness. In contrast, synthetic rugs, including nylon and polyester, provide durability and stain resistance, making them ideal for high-traffic areas. Antique rugs not only possess historical significance but also showcase exceptional craftsmanship, adding a unique charm to any space.
This diversity in rug types underscores the wide range of options available in the market.
Natural fibre rugs are meticulously crafted from organic materials such as wool and cotton, recognised for their exceptional softness and durability. These attributes render them an excellent choice for enhancing both comfort and style in home décor.
Additionally, these rugs are eco-friendly, promoting sustainability while introducing a sense of warmth to living spaces, particularly in areas where gentle cleaning is essential to maintain their integrity.
One of the primary advantages of natural fibre rugs is their ability to improve indoor air quality by absorbing humidity and filtering out toxins, significantly contributing to a healthier home environment.
Natural fibre rugs offer a diverse array of aesthetic options, enabling homeowners to choose from a variety of textures and designs that complement different tastes and décors. They are particularly well-suited for low-traffic areas such as bedrooms or formal living rooms, where their delicate nature can be fully appreciated.
For maintenance and care, it is advisable to vacuum regularly using a soft-bristled attachment to prevent damage. For deeper cleaning, a mild detergent and a damp cloth can effectively remove stains without compromising the integrity of the fibres. These rugs perform best in temperature-controlled environments; therefore, it is prudent to keep them away from direct sunlight to prevent fading.
The versatility and eco-friendliness of natural fibre rugs make them a commendable addition to any home, seamlessly blending sustainability with style.

Synthetic rugs, crafted from materials such as nylon and polyester, are highly regarded for their durability and ease of maintenance, making them particularly suitable for high-traffic areas and homes with pets. These rugs generally possess stain-resistant properties, facilitating effective cleaning and upkeep—an important benefit for homeowners seeking practical yet aesthetically pleasing flooring solutions.
Owing to their capacity to endure daily wear and tear, synthetic rugs surpass natural fibre alternatives in terms of longevity. Unlike wool or cotton, which may readily exhibit dirt and necessitate frequent cleaning, synthetic options retain their appearance with minimal effort. Regular maintenance typically involves straightforward vacuuming and occasional spot treatment, rendering them an ideal choice for busy families.
Their resistance to fading and moisture damage makes them appropriate for both indoor and outdoor environments, offering versatility that enhances any space while significantly reducing maintenance requirements.
Antique rugs, distinguished by their intricate designs and historical significance, require specialised care and preservation techniques to maintain their aesthetic appeal and value, particularly in the case of Persian rugs. Due to their delicate nature resulting from age, it is imperative to consult cleaning professionals who specialise in the care of antique rugs to prevent any potential damage during cleaning and maintenance.
Preserving these timeless pieces not only pays tribute to their craftsmanship but also protects the cultural heritage they embody. The initial step in this preservation process involves understanding the specific materials used in the rug's construction—whether wool, silk, or a blend—since each material reacts differently to various cleaning techniques.
For instance, the use of gentle, chemical-free cleaning solutions is essential to avoid destabilising dyes or fibres. Recommended practices include:
Professional assistance is invaluable, as experts can identify the appropriate methods tailored to each rug's unique requirements, preserving its historical integrity while enhancing its visual appeal.

Using a pressure washer can be an effective method for cleaning outdoor rugs, provided it is done properly to prevent any damage to the fibres and structure of the rug.
Pressure washing can effectively remove dirt and stubborn stains; however, it is crucial to follow recommended cleaning methods and guidelines to ensure the rug's longevity and maintain its aesthetic appeal.
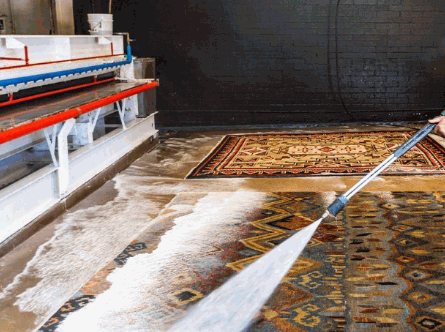
Although pressure washing rugs can be an effective cleaning method, it also presents certain risks that may damage the rug fibres if not performed with precision, particularly in high-traffic areas where wear and tear is more prevalent.
Understanding these risks is crucial for anyone contemplating this cleaning technique. The diverse range of rug materials, such as wool, synthetic fibres, and delicate silk, each responds differently to pressure washing. For example:
Moreover, the use of an incorrect nozzle or maintaining an improper distance from the rug can exacerbate these risks. Therefore, a thorough evaluation of the rug type and adherence to proper techniques are essential for preserving their integrity throughout the cleaning process.

To effectively and safely pressure wash rugs, it is essential to employ a systematic approach that includes selecting the appropriate equipment and cleaning techniques. This ensures thorough cleaning while minimising the risk of damage to the fibres.
Begin by using a pressure washer with adjustable settings to ensure that the pressure levels are suitable for the specific materials of the rugs. Additionally, it is important to apply the correct pressure washer nozzles and maintain a safe distance during the cleaning process.
Selecting the appropriate pressure washer is essential for effective carpet cleaning. It is advisable to consider options such as the Sun Joe SPX3000, which offers adjustable pressure settings tailored to various carpet materials and cleaning requirements. Proper selection is crucial to prevent damage to delicate fibres while providing the necessary power for a thorough clean, in alignment with the recommended carpet cleaning methods.
When assessing pressure washers, prospective buyers should prioritise models that feature a range of pressure options to ensure versatility. For example, the Ryobi RY14122 and the Simpson Cleaning MSH3125-S deliver robust performance suited to different surfaces.
Key considerations include:
Ultimately, adhering to these criteria will facilitate optimal results in preserving the longevity and appearance of valuable carpets.
Utilising the appropriate pressure settings and pressure washer nozzle type is crucial when pressure washing rugs. A fan nozzle is commonly recommended for gentle cleaning, as it facilitates even water distribution and minimises the risk of damage to the rug fibres. It is advisable to begin with lower pressure settings to assess the rug's resilience before making any adjustments, adhering to specific cleaning recommendations to achieve optimal results in rug cleaning.
When contemplating pressure washing rugs, it is essential to acknowledge that different rug types demand tailored approaches to preserve their integrity and appearance. For instance, a delicate silk rug may require lower pressure and a finer nozzle, while a more durable synthetic rug can withstand higher pressure settings.
To initiate the cleaning process, one should first identify the fabric type. It is also important to adjust the nozzle angle to prevent concentrated streams that could harm the fibres and to maintain a safe distance to avoid exacerbating any existing wear.
By taking the necessary time to appropriately adjust these settings, one can effectively clean rugs without compromising their quality, ultimately ensuring a long-lasting and aesthetically pleasing finish.
Before fully pressure washing a rug, it is essential to conduct a test on a small area to assess how the fabric responds to the washing technique and pressure settings. This preliminary step helps prevent potential damage and ensures that the cleaning process is both effective and preserves the integrity of the rug, which is a critical aspect of rug maintenance.
Carrying out a test area examination not only protects against irreversible harm but also aids in identifying the rug's specific cleaning requirements. Different materials, such as wool, cotton, or synthetic fibres, may exhibit varying reactions to cleaning solutions and pressure levels, which is crucial for effective rug maintenance.
The following are important signs to observe during the testing process:
By carefully considering these factors during the test, one can make informed decisions that contribute to the longevity and aesthetic appeal of the rug.
When pressure washing rugs, it is essential to utilise a mild detergent to effectively remove dirt and stains without compromising the integrity of the rug's fibres. Products such as Palmolive Oxy or Dr. Bronner’s are suitable options for this cleaning task. Combining detergent with a thorough rinse is crucial to ensure that no residue remains, as any leftover soap can attract additional dirt and diminish the rug's longevity.
Selecting the appropriate type of detergent is vital for achieving optimal cleaning results.
When applying detergent during the pressure washing process, it is important to dilute it according to the manufacturer's instructions and evenly distribute it across the rug's surface.
Following the scrubbing process, one must emphasise the significance of rinsing thoroughly to eliminate any remaining soap residue. This step not only prevents the attraction of dirt but also assists in preserving the vibrant colours and texture of the rug over time.
A thorough rinsing process is essential following pressure washing to ensure the complete removal of detergent and dirt from the rug. This prevents any build-up that could compromise its appearance or structural integrity. Subsequently, the drying phase must be managed with care, ideally in a shaded area to avoid direct sunlight, which can lead to fading and damage. This careful approach is instrumental in effective rug maintenance.
To effectively rinse the rug, one should utilise a garden hose or appropriate equipment to gently spray the entire surface. This step is critical as it assists in dislodging any remaining dirt and soap residues that may adhere to the fibres. It is advisable to conduct this task thoroughly, allowing the water to flow freely and ensuring that the rinse penetrates deeply into the pile.
Upon completion of the rinsing process, the next phase involves the drying process, which is vital for rug care.
Effective drying is crucial to prevent the development of mould or mildew. After rinsing, it is important to gently remove excess water using a clean, absorbent towel or a squeegee. Establish a drying area that is well-ventilated to promote adequate air circulation around the rug. It is also beneficial to elevate the rug off the ground using a rack or similar method to enhance airflow underneath.
Adhering to these steps during the rinsing and drying process will not only maintain the rug's cleanliness but also extend its lifespan and preserve its vibrant colours over time, contributing to effective rug preservation.
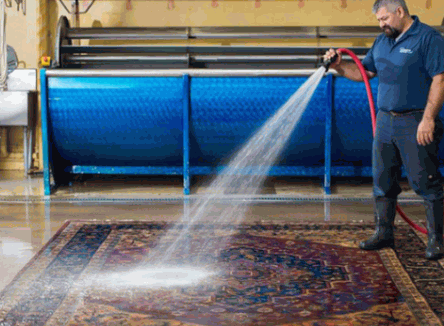
There are several alternatives to pressure washing rugs, including steam cleaning, hand washing, and using professional rug cleaning services. Each method offers distinct advantages and is suitable for different types of rugs and their respective conditions.
Steam cleaning effectively lifts dirt and allergens, while hand washing provides a gentler cleaning approach that can be customised to meet specific requirements. This method is often favoured for the cleaning of delicate upholstery.
Steam cleaning is a highly effective cleaning method that utilises hot steam to penetrate and lift dirt, allergens, and stains from rugs, making it a preferred option for maintaining cleanliness and hygiene.
This innovative process involves heating water to produce steam, which is subsequently applied to the fibres of the rug. This application allows the steam to break down stubborn grime and effectively eliminate unwanted particles. Due to its capability to sanitise without the use of toxic chemicals, steam cleaning is an excellent choice for individuals seeking eco-friendly cleaning practices.
To enhance the overall effectiveness of this method, it is advisable to adhere to best practices such as:
By incorporating steam cleaning into your maintenance routine, you not only preserve the aesthetic appeal of your rugs but also contribute to creating a healthier indoor environment.
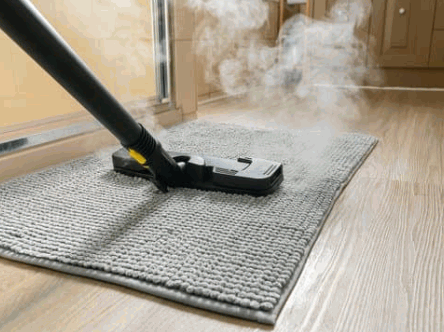
Hand washing represents a meticulous rug cleaning method that provides the necessary attention to detail, making it particularly suitable for delicate and antique rugs that require heightened care and preservation. This washing technique ensures that each section of the rug is treated appropriately, thereby minimising the risk of damage while effectively eliminating stains and dirt.
When contemplating hand washing, it is imperative to employ the correct techniques to safeguard the integrity of the fibres and dyes in the rug.
Additionally, utilising tools such as a vacuum cleaner with an upholstery attachment can aid in removing loose dirt prior to washing. When rinsing, it is essential to ensure that all soap residues are thoroughly eliminated, as residual soap can attract additional dirt. Ultimately, adhering to these practices will promote the long-term preservation of the rug while maintaining its cleanliness and vibrancy.

Engaging professional rug cleaning services is often the most effective approach for preserving the integrity and appearance of valuable or delicate rugs, including Persian rugs and stain-resistant rugs. These cleaning specialists possess the necessary expertise and tools required for thorough and effective cleaning. Their in-depth knowledge of various rug types and appropriate cleaning methods ensures that each rug receives the proper care, thereby extending its lifespan and maintaining its aesthetic appeal.
When clients enlist the services of such experts, they can anticipate a comprehensive evaluation of their rugs prior to the commencement of the cleaning process. This preliminary assessment allows clients to understand any specific challenges or requirements associated with their rugs. The professionals typically employ techniques that are both gentle and efficient, ensuring that no damage occurs—unlike the unpredictable outcomes often associated with DIY cleaning methods.
The following outlines the benefits of choosing professional services:
In contrast, DIY methods may result in potential mishaps, such as colour fading or fabric damage, underscoring the importance of entrusting this critical service to skilled professionals.
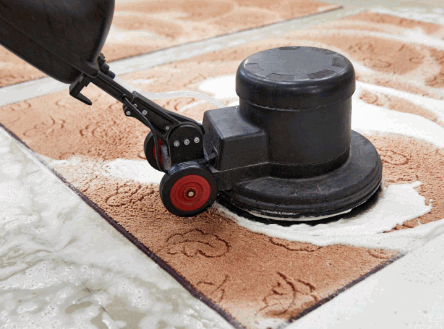
Regular maintenance and cleaning of rugs are crucial for preserving their appearance and extending their lifespan. This process includes practices such as frequent vacuuming, promptly addressing stains through spot cleaning, using an area rug beater, and rotating rugs to prevent uneven wear.
The use of rug underlay can also provide additional protection, ensuring that rugs remain in optimal condition. Furthermore, it is important to apply appropriate cleaning techniques tailored to the specific type of rug being maintained.
Regular vacuuming is a fundamental aspect of rug maintenance, essential for the effective removal of dirt and the prevention of build-up that can lead to more significant cleaning challenges over time. Adopting cleaning recommendations that include vacuuming at least once a week can significantly enhance the longevity and cleanliness of rugs.
Plus routine vacuuming, understanding the specific needs of various rug types is crucial for optimal care. For instance, natural fibre rugs necessitate gentler suction settings to prevent damage, whereas synthetic textiles can tolerate stronger suction. It is advisable to familiarise oneself with best practices related to vacuuming:
By incorporating these methods, individuals can maximise the effectiveness of their vacuum cleaner and promote a healthier living environment overall.

Addressing stains promptly is essential for effective rug care, as immediate spot cleaning can often prevent permanent damage and discolouration.
When confronted with various types of stains, it is crucial to act swiftly and employ the appropriate techniques. Begin by gently blotting the stain with a clean, dry cloth to absorb as much of the substance as possible.
Once the cleaning solution has been applied, utilise a soft-bristle brush or a clean cloth to gently work it into the fibres, taking care not to rub too vigorously, as this may damage the rug. Opt for cleaning products like Dr. Bronner’s or Palmolive Oxy. Rinse the area with clean water and blot until dry.
This meticulous approach helps preserve the rug's integrity while effectively addressing those stubborn stains.

Rotating rugs periodically is a straightforward yet effective practice that helps in preventing uneven wear and tear, particularly in high-traffic areas. By changing the position of rugs every few months, one can facilitate more uniform exposure to sunlight and foot traffic, ultimately enhancing both their durability and appearance.
This practice not only preserves the aesthetic appeal of these decorative elements but also significantly extends their lifespan, thereby providing a greater return on investment for homeowners. When considering the frequency of rotation, many experts recommend doing so every three to six months. This approach ensures that all sections of the rug experience similar wear, especially for oriental rugs or those made from synthetic fibres, which may exhibit signs of fading or flattening over time.
Implementing this simple habit can make a significant difference in maintaining the vibrancy and comfort of rugs underfoot.
Utilising rug pads, particularly rubber-backed ones, is a fundamental aspect of rug maintenance, offering essential protection against slipping and wear while significantly extending the lifespan of rugs. These pads are instrumental in absorbing impact, preventing moisture accumulation, and maintaining the rug's position, thereby constituting a valuable component of any comprehensive rug care regimen.
When evaluating the various types of rug pads available, it becomes evident that each is engineered for specific functions, thereby enhancing the overall performance of the rug. For instance, felt pads provide cushioning, ensuring comfort underfoot while safeguarding against furniture indentation. In contrast, rubber pads are particularly effective in preventing slippage, especially on smooth surfaces where movement can be hazardous. Furthermore, natural fibre pads, constructed from materials such as jute or felt, offer eco-friendly advantages while delivering durability and breathability. Consider nylon liners for areas that require additional protection.
The benefits of selecting the appropriate rug pad include:
By thoughtfully choosing the most suitable rug pad, homeowners can ensure optimal protection, comfort, and care for their rugs, especially outdoor carpet options that may need extra durability against the elements.

Power washing is not merely a cleaning method; it serves as a highly effective tool for revitalizing outdoor spaces. This process entails the removal of tough stains and grime, thereby enhancing the overall curb appeal of properties. It is important to understand the various surfaces that can be treated through power washing, as well as the essential cleaning equipment required for this task. Additionally, it is beneficial to explore guidelines for safe and effective power washing practices, along with considerations for when it may be prudent to engage professional cleaning services. Prepare to elevate the appearance of your property significantly through effective cleaning methods.

Power washing, commonly known as pressure washing, is an effective cleaning technique that employs high-pressure water to eliminate tough stains, grime, dirt, and debris from various outdoor surfaces.
This method is especially beneficial for preserving the cleanliness and aesthetic appeal of home exteriors, driveways, patios, and vehicles. By utilising heated water in conjunction with specialised cleaning solutions, power washing can revitalise surfaces, thereby enhancing kerb appeal and extending the lifespan of materials subjected to environmental exposure, such as patios and driveways.
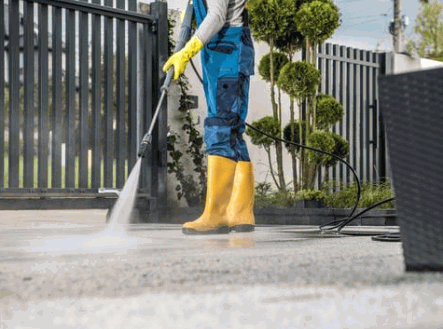
Power washing utilises a pressure washer, which produces high-pressure water jets that effectively dislodge dirt, grime, and various contaminants from surfaces, including outdoor furniture and vehicles. This method is favoured for both industrial and residential cleaning tasks, such as vehicle cleaning and patio cleaning.
The mechanics of these machines are particularly intriguing; they operate with either an electric or petrol motor that pumps water at adjustable pressures, tailored to the specific cleaning requirements, ensuring cleaning effectiveness. This adaptability enables users to address a wide range of challenges, from removing stubborn oil stains on driveways to cleaning delicate surfaces such as wooden decks, underscoring the importance of understanding the appropriate pressure settings.
Pressure washers are available in various types, including electric and petrol-powered models, each designed for specific purposes based on the necessary pressure and mobility, such as the popular Karcher models. The significance of water pressure in the removal of contaminants cannot be overstated; higher pressures yield more effective cleaning, while lower pressures are better suited for fragile surfaces.
Common cleaning techniques employed with pressure washers include:
The techniques for removal vary according to the type of surface:

Power washing provides numerous advantages, establishing itself as an essential service for both homeowners and businesses, including the removal of graffiti and algae. It is particularly effective in removing stubborn stains, dirt, and contaminants from outdoor surfaces, thereby enhancing both aesthetic appeal and durability.
By ensuring the cleanliness of these surfaces, power washing helps prevent damage caused by mould, algae, and grease stains, contributing to safe and visually pleasing environments. Regular power washing not only improves kerb appeal but also promotes the overall health and safety of outdoor spaces, making it a prudent investment for any property owner seeking professional cleaning services.
One of the primary advantages of pressure washing lies in its capacity to eliminate stubborn stains and dirt from outdoor surfaces. Whether addressing oil, grease, or mould, high-pressure washing techniques effectively restore surfaces, resulting in a clean and refreshed appearance.
The application of pressure washing methods can yield impressive results across various materials, including concrete, wooden decks, and paved driveways, showcasing the benefits of hot water pressure. This cleaning technique excels in addressing:
Moreover, pressure washing not only removes these persistent stains but also prepares surfaces for painting or sealing, thereby enhancing adhesion and durability, which is crucial for outdoor cleaning. Consequently, it serves as an invaluable tool for maintaining exterior spaces and improving property value.
Power washing significantly enhances kerb appeal by revitalising the appearance of a home’s exterior. By effectively cleaning patios, driveways, and walls, property owners can ensure their homes appear well-maintained and inviting.
When prospective buyers or visitors approach a property, the initial impression is often critical in shaping their perceptions. Enhanced kerb appeal not only makes a residence visually appealing but can also increase its overall market value, representing a prudent investment for homeowners.
There are numerous ways in which a clean exterior, achieved through effective cleaning techniques, can enhance desirability:
Utilising power washing not only improves visual appeal but also strengthens surfaces against wear and deterioration, ensuring that outdoor spaces remain vibrant and inviting for years to come, with enhanced cleaning performance.
Regular power washing is essential for preventing damage to surfaces by removing harmful contaminants such as mould, algae, and dirt that can lead to deterioration over time, using pressure washer features tailored to each surface. By employing effective cleaning techniques, homeowners can significantly extend the lifespan of their outdoor materials.
Incorporating this maintenance practice into their routine allows property owners to enhance the aesthetic appeal of their environments, thereby promoting a welcoming atmosphere. Power washing not only improves appearance but also protects structural integrity by eliminating residues that retain moisture and foster rot. The significance of maintaining cleanliness cannot be overstated, as it acts as a barrier against premature ageing and decay.
The benefits of regular power washing, including those provided by Bright Exterior Cleaning and Jet Wash Surrey, include:
This proactive approach is crucial for ensuring durability and vitality in both residential and commercial spaces.
Power washing enhances health and safety by effectively removing grime and harmful contaminants such as mildew that may pose health risks to both residents and visitors. Clean outdoor surfaces contribute to safer walking areas and minimise slip hazards, emphasizing the importance of safe cleaning methods.
Plus improving the aesthetic appeal of properties, power washing is essential for maintaining a healthy environment. By addressing the accumulation of dirt, mildew, and mould, this treatment significantly reduces the presence of allergens and bacteria that can negatively impact respiratory health, ensuring eco-friendly cleaning. In the absence of regular cleaning, these harmful elements can proliferate, exacerbating allergies and triggering various health issues.
Ultimately, prioritising cleanliness through power washing directly contributes to the overall well-being and health standards within a community.

Power washing is an effective cleaning method that is suitable for a diverse range of surfaces, such as homes and vehicles, making it a versatile technique for various outdoor applications.
Commonly power-washed surfaces include concrete driveways, patios, fences, and garden furniture, thereby ensuring that all areas of a property are properly maintained and visually appealing, using appropriate cleaning solutions and detergents.
Power washing is an effective method for cleaning exterior walls, where dirt, grime, and mould can accumulate over time. This accumulation not only diminishes the aesthetic appeal of the building but may also lead to more significant issues if left untreated, highlighting the importance of regular household cleaning.
Utilising a power washer facilitates the targeted removal of stubborn stains that are often resistant to conventional cleaning methods. By adjusting the pressure settings, various types of debris can be effectively addressed:
Furthermore, incorporating appropriate cleaning solutions can enhance the cleaning process by improving grime removal and providing protection against future build-up. Regular maintenance utilising these techniques not only preserves the visual appeal of the property but also extends the lifespan of the exterior surfaces. This is a common use of power washing, making it an essential practice for homeowners.
Explore further: How To Clean Cladding

Driveways and pathways represent key areas for power washing and pressure washing services, as they frequently accumulate dirt, oil, and other contaminants that can diminish the overall appearance of a property.
Cleaning these surfaces not only improves kerb appeal but also extends their lifespan by preventing the accumulation of harmful substances. The use of a high-pressure water system effectively removes stubborn grime and debris that a standard hose may fail to dislodge. Incorporating specialised detergents into the process ensures a comprehensive cleaning, effectively breaking down oils and stains that develop over time.
Important steps to consider in the cleaning routine include cleaning surfaces such as driveways and pathways:
This proactive approach to maintenance not only safeguards your investment but also promotes a healthier environment by eliminating allergens and pollutants trapped on these surfaces.

Patios and decks derive significant benefits from pressure washing and soft washing, as these outdoor surfaces can accumulate grime and mould that not only detracts from their appearance but may also create hazardous, slippery conditions.
When contemplating outdoor cleaning, it is essential to employ specific cleaning techniques that ensure thorough maintenance while preventing damage to the surfaces. The pressure settings for pressure washing should be adjusted according to the material; for instance, softer woods necessitate lower pressure to avoid splintering, whereas concrete surfaces can endure higher settings.
Incorporating heated water into the cleaning process can further enhance effectiveness by dissolving stubborn stains more efficiently. The benefits of heated water are significant in grime and dirt removal. Regular maintenance using these methods is vital, as it not only preserves the aesthetic appeal of patios and decks but also extends their lifespan.
To maintain cleanliness and safety, it is advisable to:

Fences, which are frequently exposed to various weather conditions, function as barriers that can accumulate dirt, mildew, and algae, necessitating pressure washing for effective cleaning.
Over time, exposure to these natural elements can lead to a decline in the fence's appearance, making regular maintenance essential. The pressure washing process, including mildew removal, presents certain challenges, as different materials—such as wood and vinyl—require distinct cleaning approaches.
For instance, wooden fences, despite their popularity, are particularly vulnerable to damage when excessive pressure is applied during washing. This pressure can strip away protective coatings, which may result in accelerated decay and mould growth.
Moreover, it is important to consider the following:
Understanding how to appropriately manage these materials is vital, in addition to maintaining vigilance regarding mould removal and preventing long-term damage. The key to success lies in achieving an effective surface cleaning while preserving the integrity of the fence itself.
Employing proper removal techniques ensures that the cleaning process is efficient and effective.

To effectively carry out power washing, it is necessary to utilise several essential pieces of equipment. This includes a pressure washer, appropriate cleaning tools, and specialised cleaning solutions that are formulated for different types of surfaces.
Service providers like the phs Group offer a range of pressure washing equipment for commercial and industrial cleaning needs.
A pressure washer serves as the foundation of power washing, adept at delivering water at high pressure to effectively clean surfaces and eliminate stubborn dirt. This tool is essential for homeowners and businesses alike, as it helps to maintain the aesthetic appeal and durability of exteriors.
There are two primary categories of pressure washers available in the market: electric and petrol models. Each category possesses distinct features and is suited for different use cases.
Electric pressure washers are typically lighter and quieter, making them an appropriate choice for domestic applications and smaller cleaning tasks. They connect to a standard electrical socket and generally provide a pressure range of 1300 to 2000 PSI. In contrast, petrol pressure washers offer greater power and can achieve pressures exceeding 3000 PSI, making them suitable for heavy-duty tasks such as paint stripping or driveway cleaning. However, they require more maintenance and tend to operate at a higher noise level.
The selection between electric and petrol models should be based on specific cleaning requirements and the desired performance of the pressure washer. A thorough understanding of the specifications and capabilities of each type will facilitate an informed decision for effective cleaning.
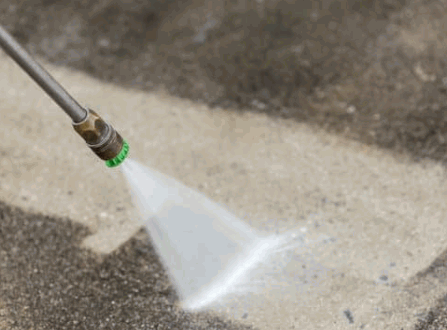
Specialised cleaning solutions or detergents significantly enhance the effectiveness of pressure washing by breaking down stubborn stains and contaminants.
Selecting the appropriate cleaning agents can markedly influence the results of the pressure washing process, ensuring that surfaces are not only thoroughly cleaned but also adequately protected. Various materials, such as wood, concrete, and metal, necessitate specific detergents to prevent damage while maximising cleaning efficiency. For example, a biodegradable detergent formulated for outdoor use may be particularly suitable for wooden decks, as it effectively removes grime without adversely affecting the environment or compromising the integrity of the surface.
Understanding the unique requirements of each surface is essential for achieving a thorough clean while promoting sustainability. Therefore, investing in high-quality, tailored products yields optimal results.
The use of appropriate safety gear is imperative when power washing, as it protects the operator from potential injuries related to high-pressure water and chemical exposure. Neglecting safety precautions can result in serious harm, making it essential for individuals engaged in this cleaning method to equip themselves accordingly.
Primarily, wearing durable gloves is essential, as they provide necessary protection against chemicals and water splashes. Furthermore, goggles are crucial for safeguarding the eyes from flying debris, which can lead to significant injury during operation.
Investing in protective clothing, such as long sleeves and sturdy trousers, is also advisable, as it shields the skin from both high-pressure streams and hazardous substances. Additionally, the use of ear protection is recommended to mitigate the loud noise generated by the equipment.
By prioritising these safety measures, operators can not only ensure their well-being but also achieve effective cleaning outcomes without interruption. Ultimately, safety gear is not merely a suggestion; it is a vital component of any successful power washing operation.
Companies like Karcher provide comprehensive pressure washing equipment and cleaning chemicals to suit various requirements.

To ensure safe and effective pressure washing, it is imperative to adhere to a comprehensive set of guidelines. This includes understanding the appropriate pressure settings, employing the correct cleaning techniques, and implementing proper safety measures.
Additionally, consider water conservation methods to minimise environmental impact during the process.
Before commencing power washing, it is essential to thoroughly review the manufacturer's instructions to gain a comprehensive understanding of the specific requirements and recommended practices for the pressure washer being used.
This step is crucial, as a failure to comprehend the pressure settings may result in inadequate cleaning outcomes or potential damage to the surfaces being treated. Each pressure washer is equipped with various features designed for specific cleaning tasks, including common uses like dirt and debris removal, and familiarising oneself with these components can significantly enhance operational effectiveness. A solid understanding of the appropriate cleaning techniques is vital for optimal equipment usage, especially when using Karcher or electrical machines for power washing.
The following key aspects should be considered:
Ultimately, dedicating time to understand these elements, including surface preparation, will not only improve the performance of the pressure washer but also extend its lifespan, ensuring a successful washing experience. The heated water benefits offered by some gas power washers can further enhance the effectiveness of the cleaning process.
Wearing protective gear is an essential requirement for ensuring safety during pressure washing, as it mitigates potential hazards associated with high-pressure water and harmful chemicals.
To effectively protect oneself from these dangers, several types of equipment should be utilised:
The use of this protective gear not only enhances safety but also facilitates a more efficient cleaning process by minimising distractions caused by injuries or discomfort.

Testing the pressure settings on a pressure washer prior to commencing the cleaning process is essential to prevent potential damage to surfaces and to minimise the risk of injury.
Proper calibration of the pressure not only enhances the overall effectiveness of the cleaning task but also mitigates the likelihood of unintended damage. The appropriate pressure settings should be determined based on factors such as the type of surface being cleaned and the nature of the dirt or grime. For instance, while high pressure may be suitable for concrete surfaces, it could result in damage to wooden surfaces.
Before initiating any cleaning task, it is advisable for users to conduct a test spray in a small, inconspicuous area. Additionally, it is recommended to start with the lowest pressure setting and gradually increase it as needed. Consideration should also be given to the distance between the nozzle and the surface, as a greater distance can reduce the pressure impact.
These careful adjustments are critical to ensuring both effective cleaning and the preservation of the integrity of the surface being treated.
Employing appropriate cleaning techniques during power washing is essential for achieving effective results while minimising the risk of damage to surfaces.
To obtain optimal outcomes, it is imperative to adhere to methodical approaches that emphasise careful planning and execution. Understanding the appropriate distance from surfaces is critical; maintaining an optimal distance between the nozzle and the area being cleaned can significantly influence the effectiveness of the wash. For more delicate materials, a greater distance may be required, whereas tougher surfaces can generally withstand closer treatment. Utilising proper movement patterns, such as sweeping motions and overlapping strokes, will further enhance cleaning efficiency.
Ultimately, a strategic approach to power washing not only ensures impressive results but also safeguards against unwanted wear.

Engaging a professional for pressure washing, such as those from Bright Exterior Cleaning or Jet Wash Surrey, presents numerous advantages, particularly in situations involving extensive areas, stubborn stains, or uncertainty regarding the appropriate equipment and techniques necessary for effective cleaning.
In many instances, the choice to utilise a cleaning service becomes crucial. For example, when dealing with challenging surfaces such as decking, patios, or driveways constructed from various materials, professional cleaners possess the expertise to safeguard these surfaces from potential damage while delivering superior results. Large-scale projects, such as the cleaning of commercial building exteriors, require advanced equipment and trained personnel to ensure a comprehensive cleaning process without the risk of oversights.
The advantages of employing trained professionals include:
Ultimately, utilising professional pressure washing services not only guarantees effective cleaning but also contributes to the longevity of these valuable surfaces while enhancing their overall appearance.

If you're looking to maximise your home's potential without the hassle of moving, a loft conversion could be the perfect solution. This guide explores the process of transforming your attic into a functional and stylish living space. From understanding the various types of conversions to navigating the design process and crucial considerations, it covers everything you need to know. Discover how a loft conversion can enhance your home’s value and provide the extra space you've been dreaming of.

A loft conversion is a transformative home renovation that utilises the unused space beneath the roof to create functional living areas, such as a stylish bedroom, a comfortable home office, or even an additional bathroom, enhancing both the aesthetics and functionality of a property.
With the rise in urban living and the need for more compact yet practical spaces, loft conversions are becoming increasingly popular as they offer unique opportunities to reimagine the layout of a house while maximising natural light with well-placed windows and thoughtful design features.

Considering a loft conversion can be a game-changer for homeowners looking to maximise their living space without the substantial costs associated with moving to a larger property. By transforming unused loft areas into stylish and functional spaces, such as additional bedrooms or a compact home office, you can not only enhance your family’s quality of life but also increase the overall value of your property in the property market.
One of the most significant benefits of loft conversion is the immediate increase in living space it provides, allowing homeowners to create unique rooms tailored to their needs, whether that’s a vibrant play area for children, a cosy guest bedroom, or an efficient home office designed for productivity.
This additional area can be further enhanced by considering various design ideas that cater to both practicality and aesthetics. For instance, incorporating skylights can flood the space with natural light, creating a warm and inviting atmosphere. Homeowners may opt for built-in storage solutions to keep the area organised while maintaining its stylish appeal.
The possibilities are endless, making it a valuable investment that enhances the overall functionality of the home.
Investing in a loft conversion is not just about enhancing your living space; it’s also a strategic move to add significant value to your property, making it more appealing to potential buyers in a competitive market. A well-executed loft conversion can elevate the overall worth of your home, ensuring that your investment pays off in the long run.
Statistics show that converting a loft can increase property value by up to 20%, a figure that highlights the financial benefits of this renovation. Homeowners have reported impressive returns after upgrading unused attic spaces into functional areas such as guest rooms or home offices.
Consider a case study where a property was transformed with a stylish loft conversion. After the renovation, the home not only attracted more buyers but sold for substantially more than the initial purchase price. Factors such as location, design quality, and space optimisation contribute significantly to property valuation.
Ultimately, investing in a quality loft conversion can not only transform an unused space into a valuable asset but also facilitate a profitable sale when the time comes.

For families outgrowing their current homes, a loft conversion offers a cost-effective alternative to moving, allowing them to expand their living space without the hassle and expense of relocating to a new property. By transforming their existing loft area, homeowners can create additional bedrooms or multifunctional spaces that meet their evolving needs without incurring the high costs associated with buying a new home.
This renovation not only enhances the value of the property but also provides a practical solution for larger families looking to stay in their beloved neighbourhoods. By opting for a loft conversion, homeowners save on several expenses, such as removal costs and stamp duty, allowing them to allocate funds towards enhancing their new space.
With the flexibility to design a custom room layout that fits their family’s lifestyle – such as a playroom for children or a home office for working parents – they can transform previously unused areas into functional living spaces.
Ultimately, making the choice to convert a loft provides homeowners with the ability to stay in the communities they love while adapting their homes to suit their changing needs, giving them more time to enjoy life rather than deal with the complications of moving.
Understanding the different types of loft conversions is crucial for homeowners considering this home renovation, as each type offers unique benefits and design possibilities to suit individual needs and preferences.
From the classic dormer conversion that maximises space and light to the sleek Velux conversion that utilises existing roof angles, choosing the right option can significantly influence the functionality and aesthetics of the newly created space.
Find out more: How To Insulate A Loft Conversion
A dormer conversion is a popular choice for homeowners looking to maximise space and natural light within their loft, featuring a structure that extends vertically from the existing roof. This type of conversion is ideal for creating additional headroom and usable floor area, making it an excellent option for bedrooms or bathrooms. The benefits of such conversions extend far beyond mere aesthetics, offering a variety of practical solutions for enhancing living areas.
Ultimately, a dormer conversion not only enhances the functionality of a home but also elevates its overall charm and value.

Hip-to-gable conversions involve altering a hip-roofed house to create a vertical gable wall, effectively increasing the usable space within the loft. This type of conversion provides exceptional headroom and is particularly suitable for creating spacious bedrooms or multi-functional areas for the whole family.
By undertaking this type of renovation, homeowners not only enhance their property’s aesthetic appeal but also promote better functionality throughout the residence. Transforming unused attic space into practical living areas can significantly improve family dynamics, offering children their own rooms or craft areas, and adults a sanctuary away from the hustle and bustle.
Hip-to-gable conversions can provide versatile environments tailored perfectly for modern family living.

A mansard conversion is a distinctive type of loft conversion characterised by a flat roof and steeply sloping sides, allowing for maximum headroom and space efficiency within the loft. This design not only enhances the aesthetics of a home but also provides ample room for creating stylish and comfortable living areas.
The elegant lines of a mansard roof can dramatically increase kerb appeal, making it a popular choice among homeowners looking to blend modernity with classic architectural styles. This type of conversion typically offers significant advantages in terms of both space management and design flexibility.
By seamlessly integrating additional rooms within the confines of a unique roof structure, mansard conversions enhance not just space but also lifestyle options.

Velux conversions are an excellent choice for homeowners looking to enhance their loft with minimal structural changes, utilising roof windows to bring in natural light while maintaining the existing roof line.
This type of conversion is particularly effective for creating compact spaces such as home offices or reading nooks, maximising the use of natural light for a comfortable atmosphere.
One remarkable advantage of Velux conversions is the ease of installation, making them a preferred option for many. Unlike more extensive renovation projects, the installation of roof windows can typically be completed quickly, resulting in minimal disruption to daily life. Homeowners can enjoy their new spaces without the lengthy construction timeline that often accompanies other types of renovations.
By thoughtfully integrating these elements, the overall ambience of the room can be transformed into a bright and inviting retreat.

Designing a loft conversion involves several key steps that ensure the project is both functional and aesthetically pleasing, starting with a thorough assessment of your available space and budget. Engaging an architect early in the process will help you create a detailed design plan that meets your needs and complies with necessary planning permissions and building regulations, setting the stage for a successful renovation project.
The first step in designing a successful loft conversion is to thoroughly assess your available space and establish a realistic budget that accounts for all aspects of the project, including materials, labour, and potential unforeseen costs. This assessment will guide your renovation plans and help prioritise features that are essential for your unique needs.
To effectively evaluate the loft space, one should consider several crucial factors, such as overall size, ceiling height, and layout suitability.
Begin by measuring the dimensions of the loft to determine usable floor space and to visualise where key elements, like furniture and lighting, will fit. Ensure that the height allows for comfortable movement and possibilities for natural light to enhance the atmosphere.
When discussing layout, think about how to organise spaces efficiently while adhering to your personal preferences.
Outlining a budget that encompasses all potential expenses can prevent surprises during the renovation process. This should include not only construction costs but also financing fees, permits, and contingencies for unexpected upgrades or repairs.
Consulting with an experienced architect is a vital step in the loft conversion design process, as they can provide valuable insights into the best design options that maximise space and functionality while ensuring compliance with building regulations. An architect will help translate your ideas into a cohesive plan, highlighting essential features such as windows for natural light and effective storage solutions.
Along with these fundamental aspects, the architect's role extends into numerous areas that influence how a newly converted loft can truly meet the homeowner's needs. Their expertise enables them to assess your space critically, paving the way for innovative ideas that enhance both aesthetics and utility. They can suggest:
By tailoring these elements, the architect not only creates a functional living space but also enhances the overall value of the property. Ultimately, collaboration with a skilled architect can turn a simple loft into a remarkable space that is both beautiful and practical, embodying the vision of modern living.
Before commencing your loft conversion project, it is crucial to obtain the necessary permissions and approvals from local authorities, ensuring that your renovation complies with building regulations and planning laws. This step is essential to avoid potential legal issues and ensure a smooth construction process.
Understanding the various types of permissions required can be quite daunting, yet it is vital for the integrity of any loft conversion. The two primary types you will likely encounter are planning permission and building regulations approval.
Planning permission is necessary if the alterations affect the external appearance of your home or if your property is situated in a conservation area. On the other hand, building regulations approval ensures that structural changes adhere to safety and health standards.
To navigate the application process effectively, it is advisable to consult with your local council early on. They can provide guidance on submitting your application and any documentation required, significantly influencing the approval timelines.

Creating a detailed plan and design for your loft conversion is essential for the successful execution of your project, allowing you to visualise the final outcome and ensure that all your requirements are met. Collaborating with your architect, you can incorporate essential features like built-in storage, efficient layouts, and stylish fixtures to create a space that is both functional and aesthetically pleasing.
Developing a comprehensive design encompasses not only the arrangement of space but also the selection of materials that complement the overall vision.
To begin with, consider the following design principles:
Regular discussions with your architect throughout the design process can reveal innovative solutions that align with your vision and budget, ultimately leading to a cohesive, harmonious environment that meets all your needs.
Choosing the right materials and finishes for your loft conversion is critical, as it affects not only the aesthetics of the space but also its functionality and durability. Carefully selecting quality materials that reflect your personal style and meet the practical needs of your family will ensure your new loft area is both stylish and enduring.
When considering options, one should explore various possibilities, such as hardwood floors for warmth and comfort, or sleek tiles for a modern touch.
In addition, the type of wall finishes—such as textured plaster or smooth paint—can dramatically alter the feel of a space. The incorporation of:
is essential, not only to enhance the appearance but also for sustainability.
By blending these elements together, a harmonious connection between aesthetic appeal and practical usage is achieved, making the loft conversion a true reflection of one’s lifestyle.
Once your design is finalised, the next crucial step in the loft conversion process is to hire a reliable contractor who can bring your vision to life while adhering to your budget and timeline. A skilled contractor will ensure that the construction is executed properly, and meets all safety standards and building regulations.
Choosing the right contractor is essential for the success of any renovation project, including loft conversions, as it directly affects the overall quality of the work executed. It’s advisable to start by gathering recommendations from friends or online reviews, which can provide valuable insights into the contractors’ previous work.
When interviewing potential contractors, consider asking the following questions:
These inquiries can help assess their reliability and professionalism while ensuring that your project is managed effectively, potentially saving time and money in the long run.
Monitoring the construction process of your loft conversion is essential to ensure that the project stays on track and consistently aligns with your design specifications, budget, and timeline. Effective communication with your contractor throughout the process will help address any potential issues early and facilitate a successful renovation.
Regular check-ins should not be underestimated, as they play a critical role in project management. Establishing a routine for updates can prevent misunderstandings and help all parties stay informed. By setting aside time for these discussions, you will encourage transparent dialogue which can lead to insights on progress and potential risks.
Documenting these discussions can serve as a reference for both you and the contractor, creating accountability and a clearer understanding of project milestones. Remember, proactive engagement fosters an environment where adjustments can be made, ensuring that the vision for the loft conversion is ultimately realised.
When planning a loft conversion, several design considerations must be taken into account to ensure that the new space is functional, comfortable, and visually appealing. Key factors such as maximising natural light, ensuring adequate headroom, and creating a functional layout will significantly influence the overall success of the conversion, allowing homeowners to enjoy their new living spaces for years to come.
Maximising natural light in a loft conversion is essential for creating a bright and inviting atmosphere, making the most of the available space, and enhancing the overall design. Strategically placing windows, skylights, and open layouts can significantly improve the flow of light throughout the loft area, contributing to a more pleasant living environment.
To achieve this, consider incorporating a variety of techniques that not only improve functionality but also elevate the aesthetic appeal of the space. Natural light can be harnessed through:
By thoughtfully integrating these elements, one can transform a loft into a luminous haven, where every corner feels airy and spacious.

Ensuring adequate headroom is a critical design consideration for any loft conversion, as it directly impacts the usability and comfort of the space.
Homeowners should aim for a minimum head height that allows for comfortable movement and the placement of furniture, particularly in areas designated for bedrooms or living spaces.
When planning a loft conversion, it is vital to assess the existing height before any structural changes are made. Space utilisation becomes a key factor in achieving an inviting environment that feels spacious rather than cramped.
By focusing on layout planning, homeowners can maximise the available area while ensuring that each corner of the loft is both functional and aesthetically pleasing.
Ultimately, investing time in understanding these aspects leads to a more enjoyable living experience.
Creating a functional layout is paramount when designing a loft conversion, as it determines how effectively the new space can be utilised for various purposes, such as bedrooms, home offices, or storage areas. A well-planned layout considers traffic flow and usability, ensuring that every square foot of the loft serves a valuable purpose.
When approaching the design of a loft, it’s essential to contemplate the importance of space planning to ensure optimal functionality. This begins with a careful assessment of the area, followed by prioritising needs based on lifestyle.
Implementing these strategies not only facilitates a more aesthetically pleasing environment but also amplifies the overall functionality and enjoyment of the loft.
Incorporating smart storage solutions in a loft conversion is essential for maximising the utility of the space, particularly in areas where square footage may be limited. Creative built-in storage designs can help keep the loft organised while enhancing the overall aesthetics and functionality of the area.
Utilising innovative storage strategies greatly complements the unique architecture of a loft. For instance, custom shelving can be designed to fit snugly under sloped ceilings, leveraging every available inch while creating a visually appealing feature. Additionally, multi-functional furniture such as beds with drawers or ottomans that open up offer practical options without sacrificing style.
These approaches not only enhance the usability of the loft space but also contribute to a more organised and serene living environment.

Complying with building regulations is a crucial aspect of any loft conversion project, as it ensures that the renovation meets safety standards and legal requirements. Understanding these regulations is essential, as they not only protect the occupants but also increase the property’s value and avoid potential legal issues in the future.
Homeowners must be aware of the necessary regulations that apply to their specific project and work closely with their architect and contractor to ensure compliance throughout the design and construction phases. Key areas of compliance include:
Familiarity with these compliance areas not only enhances safety but also adds peace of mind, allowing homeowners to focus on creating a beautiful and functional space in their loft.
A loft conversion can be a fantastic way to create additional living space in your home, but proper insulation is crucial to ensure comfort and energy efficiency.
This guide covers the essentials of loft conversion insulation, exploring different types, methods, and their benefits.
Learn about potential pitfalls to avoid and how to select the best insulation for your needs.
Get ready to transform your loft into a cozy, well-protected area in your home!
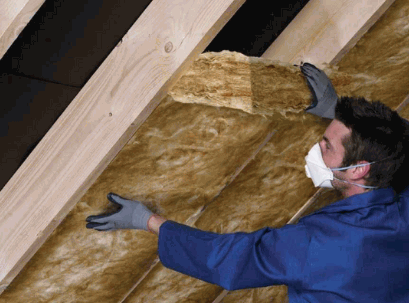
A loft conversion is a transformative home improvement project that involves converting an unused loft space into a functional living area, enhancing both the home’s utility and value. This renovation not only maximises the potential of existing structures but also adheres to building regulations to ensure safety and compliance.
Homeowners can create additional bedrooms, offices, or recreational spaces in the loft, effectively utilising vertical space within their properties. By incorporating proper insulation materials and techniques, a loft conversion can offer energy efficiency and comfort, ultimately leading to a significant increase in home value.
Explore further: What Is A Shell Loft Conversion

Insulation is a critical element in any loft conversion, as it significantly enhances energy efficiency and minimises heat loss, which can lead to reduced energy bills for homeowners.
Proper insulation techniques help prevent thermal bridging and moisture build-up, ensuring that the converted loft remains comfortable throughout the seasons.
By using high-quality insulation materials such as mineral wool, cellulose fibre, or rigid boards like Kingspan and Celotex, you can create a breathable environment that mitigates the potential for condensation and promotes a healthier living space.
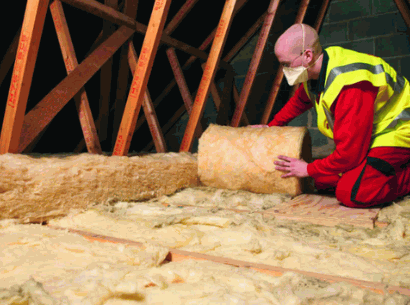
When undertaking a loft conversion, selecting the right type of insulation is vital for ensuring optimal energy efficiency, sound insulation, and moisture control.
Various insulation materials are available, each offering unique benefits and applications in a loft setting. Common options include mineral wool, known for its excellent thermal performance, rigid boards made from polystyrene or cellulose, and natural insulation materials like Warmcel.
Choosing the appropriate insulation thickness and method will depend on factors such as the construction type—whether it is a cold roof or a warm roof system—and the desired outcome for the living space.
Blanket insulation, commonly made from mineral wool or wool insulation, is a popular choice for loft conversions due to its versatility and ease of installation. This type of insulation is available in batts or rolls, making it suitable for fitting between roof rafters and ceiling joists efficiently. When applied correctly, blanket insulation can effectively reduce heat loss and improve energy efficiency in the converted loft space.
One of the significant advantages of using blanket insulation is its ability to provide a high level of thermal resistance, ensuring that the loft remains comfortable throughout the year. It plays a critical role in sound insulation, effectively dampening noise from both external sources and within the home. This is particularly important in multi-storey properties where noise transfer can be an issue.
During installation, it is essential to consider the thickness of the insulation material, as greater thickness often correlates with superior performance. Typically, maintaining an appropriate insulation depth not only enhances energy efficiency but also contributes to a more stable indoor climate.
By properly selecting and installing blanket insulation, one can achieve a harmonious balance of warmth, quiet, and eco-friendliness in their loft conversion.
Loose fill insulation, typically composed of cellulose fibre or other lightweight materials, is another effective option for insulating lofts, particularly in hard-to-reach areas. This method involves blowing the insulation material into the loft space, allowing it to conform to the shape of the area, effectively minimising gaps and ensuring thorough coverage. While it offers excellent thermal performance, it is essential to maintain a ventilation gap to prevent potential moisture build-up.
When considering insulation options, loose-fill insulation provides a highly adaptable solution that can accommodate various loft configurations. Its ability to reach tight corners and uneven surfaces makes it particularly suitable for older buildings where traditional insulation might not fit properly. The thermal efficiency of this material aids in maintaining a stable indoor climate, reducing heating costs significantly.
In scenarios where space is limited, such as attics with low headroom, loose-fill insulation can be the optimal choice compared to rigid boards or batts, ensuring that the insulation layer remains effective while saving valuable space.
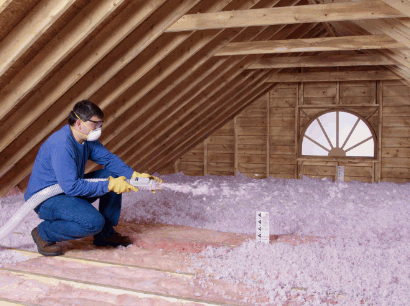
Rigid board insulation, commonly made from materials like polystyrene, is a solid choice for loft conversions, especially when addressing thermal bridging and achieving high insulation performance. This type of insulation is installed as boards between the rafters or over the existing roof structure, providing a continuous layer of insulation that minimises heat loss. Incorporating vapour control strategies is crucial when using rigid boards to prevent moisture issues within the loft.
By utilising rigid board insulation, homeowners can significantly enhance energy efficiency, as these boards boast exceptional thermal performance properties. This means that they effectively resist heat flow, ultimately leading to lower energy bills and a more comfortable living space.
Therefore, when planning your loft conversion, considering the properties of rigid board insulation is essential for achieving optimal thermal efficiency and maintaining a healthy living environment.
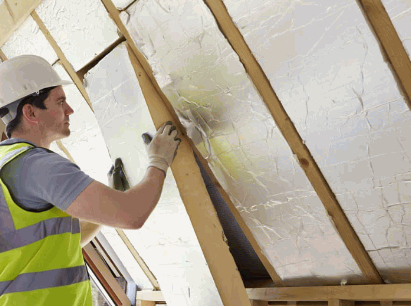
Insulating a loft conversion involves several steps that ensure optimal energy efficiency and comfort, regardless of whether you have a cold roof or a warm roof structure. The process begins with assessing the existing loft space and then selecting the appropriate insulation method, which may include blanket insulation, rigid boards, or loose-fill insulation, depending on the structure's unique requirements.
Installation should be conducted with attention to detail, ensuring proper fit between roof rafters and ceiling joists, and considering the necessary insulation thickness for the desired energy savings.
When insulating the roof of a loft conversion, it is essential to focus on the space between the roof rafters, where insulation boards or blanket insulation can be installed to prevent thermal bridging and maximise thermal efficiency. Proper installation techniques must be employed to ensure that the insulation fits snugly, eliminating gaps that could allow heat to escape. Incorporating vapour control layers is vital to prevent moisture build-up and maintain a healthy living environment.
Several types of insulation materials are suitable for this application, including:
Addressing thermal bridging is critical; consider using insulated roof panels that effectively minimise heat loss through rafters. Proper ventilation is necessary to control moisture levels, thus preventing mould growth and structural damage.
For effective installation, always check for proper fits, use sealants where necessary, and follow manufacturer guidelines to enhance the overall effectiveness of the insulation system.

Insulating the walls of a loft conversion is critical for both energy efficiency and sound insulation, ensuring that the space remains comfortable and private. Depending on the wall structure, various insulation methods can be applied, including the use of insulation boards or mineral wool to fill cavities. It is important to consider the insulation thickness required to achieve optimal performance while incorporating a breathable membrane to manage moisture effectively.
The choice of materials for insulation in a loft conversion can greatly influence the overall effectiveness of the project.
Addressing sound insulation is essential in a loft conversion, as external noises can intrude into this converted space.
Moisture management, using materials that breathe, will also ensure a healthier indoor environment, preventing mould and ensuring durability.
When planning insulation, integrating both thermal and acoustic considerations truly enhances the comfort and livability of this unique space.

Insulating the floor of a loft conversion is essential to prevent heat loss and enhance energy efficiency, particularly when the space below is heated. The installation of insulation materials between the floor joists typically involves selecting insulation materials that provide effective thermal resistance without taking up excessive space. Careful consideration of insulation thickness is crucial, as well as ensuring proper moisture control to avoid issues like dampness and mould.
To achieve optimal performance, homeowners should explore various insulation materials such as mineral wool, which excels at soundproofing and moisture absorption while maintaining thermal efficiency. Rigid foam boards present an excellent option due to their high R-values, offering significant heat retention with minimal space usage. During the installation process, it’s vital to ensure all gaps between the boards are filled to avoid air leaks, which can undermine insulation efforts.
Implementing these methods contributes to a more sustainable living environment, ensuring both comfort and energy savings in the long run.
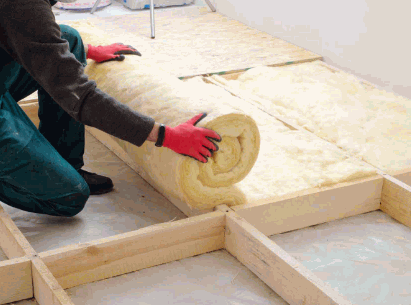
Insulating a loft conversion offers numerous benefits that significantly enhance the overall value and liveability of your home. One of the most notable advantages is improved energy efficiency, which can lead to substantial savings on energy bills by reducing heat loss.
Additionally, effective insulation promotes a comfortable indoor environment throughout the year, minimising drafts and cold spots. Furthermore, proper sound insulation can create a peaceful living space, making the loft a more desirable area in the home, and ultimately increasing property value.
Energy efficiency is one of the primary benefits of insulating a loft conversion, as it significantly reduces heat loss and helps maintain a comfortable indoor climate. Proper insulation materials, such as mineral wool or rigid boards, can create a thermal barrier that minimises the energy required for heating and cooling, leading to lower energy bills for homeowners.
In fact, by investing in the right insulation, homeowners can expect to see a noticeable impact on their overall energy consumption. For instance, high-quality insulation materials can reduce heating bills by up to 20%, depending on the type and thickness of insulation used. Along with mineral wool and rigid boards, options like spray foam and cellulose also provide excellent thermal resistance. To maximise insulation performance in a loft conversion, consider the following tips:
Ultimately, a well-insulated loft not only enhances energy efficiency but also contributes positively to the home's energy rating, making it a valuable investment.
Improved comfort is a significant benefit of loft insulation, as it provides better temperature regulation and contributes to a pleasant indoor climate. With effective insulation, the loft space remains warm during winter and cool during summer, minimising fluctuations in temperature that can lead to discomfort.
The role of insulation extends beyond just temperature control; it plays a crucial part in noise reduction, creating a serene haven away from the clamour of everyday life. By acting as a barrier against sound transmission, insulation helps to prevent external noises from seeping into the loft, allowing for a more peaceful atmosphere.
When one chooses to invest in insulation, they are not merely enhancing the room's thermal performance but also creating a space where they can relax and unwind without disruptions from outside. This dual functionality of insulating not only solidifies comfort levels but also encourages a greater appreciation for loft living.
Therefore, whether it’s the cosy warmth in the winter or the tranquil silence during warm summer nights, effective insulation ensures that the loft is not just another room, but a true retreat.
Cost savings are a crucial advantage of insulating a loft conversion, as effective insulation can lead to reductions in energy bills and an excellent return on investment. While initial insulation costs may vary based on materials and methods, the long-term benefits far outweigh these expenses, making it a worthwhile investment for homeowners.
When evaluating the overall impact of insulation, it is essential to consider that energy efficiency not only contributes significantly to reducing monthly utility costs but also enhances the comfort and livability of a home. Properly insulated spaces maintain a consistent temperature throughout the year, eliminating cold draughts in winter and minimising excessive heat during summer months.
Many homeowners may not be aware of the financial incentives associated with insulation projects.
Investing in insulation not only fosters a more sustainable living environment but can also increase property value, as prospective buyers are often attracted to homes with lower energy costs and enhanced comfort. Evidence from recent real estate trends indicates that homes with upgraded insulation perform better in the market.

While insulating a loft conversion provides many benefits, several potential issues must be considered to ensure a successful project. Common challenges include condensation, which can arise from inadequate ventilation, leading to moisture build-up and mould growth.
Additionally, fire safety regulations must be adhered to, as certain insulation materials may pose risks if not properly installed or rated.
Condensation is a frequent issue encountered when insulating a loft, often resulting from poor ventilation and moisture build-up trapped within the insulation layers. To prevent condensation, it is vital to maintain a proper ventilation gap, allowing air circulation that can reduce humidity levels in the loft space.
This moisture accumulation can lead to more severe problems such as mould growth, structural damage, and overall deterioration of the insulation material. It's essential that homeowners are proactive in their approach. By implementing effective ventilation strategies and regularly monitoring humidity levels, they can significantly enhance the performance of their loft insulation. Consider integrating solutions like:
Utilising a hygrometer helps in tracking moisture levels, enabling timely interventions. Incorporating moisture control measures during the insulation design phase will further mitigate the risk of condensation, ensuring a healthier loft environment.
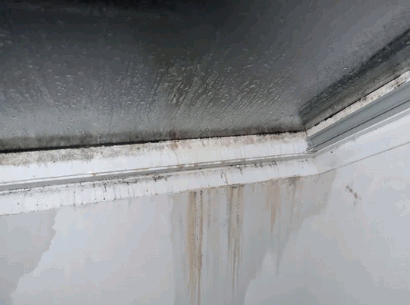
Proper ventilation is essential for maintaining insulation performance and overall comfort in a loft conversion, as it helps control moisture levels and promotes air circulation. Without adequate ventilation, moisture can accumulate, potentially leading to structural issues and compromised insulation effectiveness. Inadequate airflow can lead to unhealthy living conditions, making it crucial to explore different options that cater specifically to loft spaces.
When considering ventilation for a loft conversion, homeowners have several options to choose from:
Integrating these ventilation strategies not only ensures a healthier living environment but also significantly boosts insulation performance. For optimal results, it is recommended to adopt a combination of these methods tailored to the specific needs of the loft conversion.
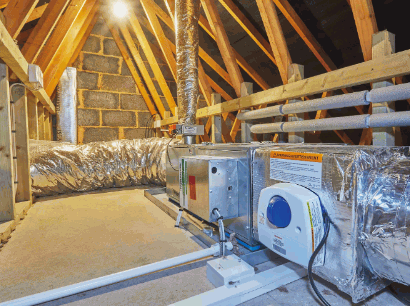
Fire safety is a critical consideration when insulating a loft conversion, as certain insulating materials can pose fire hazards if not compliant with building regulations. It is essential to choose insulation products that meet fire safety standards and to implement proper installation techniques that minimise risks.
Ensuring that loft conversions adhere to rigorous fire safety measures not only protects the inhabitants but also complies with legal requirements. When selecting insulation, options such as mineral wool, which is non-combustible and versatile, become vital choices for safety.
After the installation, regular inspections should be conducted, focusing on any signs of wear or damage. It is crucial to maintain clear paths for escape and ensure that smoke alarms are appropriately installed and functioning, as these simple measures can dramatically enhance safety in the event of a fire.
Choosing the right insulation for your loft conversion is essential for achieving optimal performance and long-term benefits. Understanding the various insulation types available is key to making informed decisions that enhance your home's energy efficiency. Factors to consider include the insulation types available, such as blanket, loose fill, or rigid boards, and their respective thermal properties. It is important to comply with building regulations, which dictate minimum insulation standards to ensure energy efficiency and safety.
Along with the type of insulation, assessing the specific needs based on the loft's structure and intended use is critical.
Adhering to local building regulations not only safeguards your investment but also ensures comfort and safety for the occupants. Proper evaluation and installation will lead to a successful loft conversion project that meets your requirements for warmth and energy savings.

Insulating a loft conversion is a crucial step in enhancing energy efficiency, improving home comfort, and increasing property value. The range of insulation materials and techniques available allows homeowners to find the right solution tailored to their specific needs and goals. By investing in quality insulation, homeowners not only contribute to a more sustainable living environment but also secure long-term financial benefits through reduced energy bills and increased home value.
Effective insulation plays a significant role in regulating indoor temperatures, preventing heat loss during colder months, and keeping spaces cool in the summer. This regulation contributes to a more pleasant living environment, making the converted loft a cosy retreat year-round.
Considering insulation as an integral part of the renovation process can yield substantial dividends, fostering a home that is not only environmentally friendly but also a wise financial investment.
Are you considering maximizing your home's potential? A shell loft conversion might be the perfect solution.
This transformative renovation creates a blank canvas in your attic space, allowing you to tailor it to your needs.
Explore the various types of loft conversions, and understand the process of a shell conversion step-by-step. We will highlight its benefits, and discuss costs, timelines, and whether it's suitable for your property.
Get ready to uncover the possibilities!
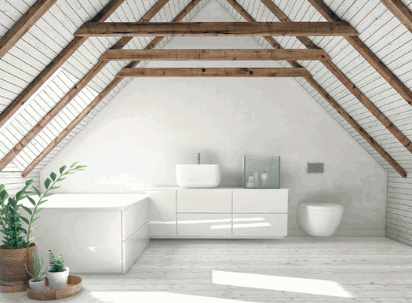
A shell loft conversion is a transformative home improvement project that involves renovating an existing loft space into a usable living area, often enhancing the property's value while providing valuable space for various purposes.
This type of renovation can include structural work to ensure the integrity of the building, making it a sound investment for homeowners looking to maximise their residential properties.

There are several types of loft conversions available, including the popular dormer conversion, which adds headroom and space, and the mansard conversion, designed to maximise the usable area and aesthetic appeal of the home. Other types, like the Velux window conversion, allow for natural light while maintaining the original roofline, making them a common choice for homeowners seeking a blend of form and function.
Each type of loft conversion offers unique benefits that cater to various homeowner needs. For instance, the dormer conversion is excellent for families needing extra bedrooms, as its straightforward design can easily accommodate more living space.
Ultimately, the choice between these conversions depends on the existing architecture of the home, planning regulations, and individual lifestyle preferences, allowing each homeowner to find the ideal fit for their needs.

The process of a shell loft conversion is a detailed journey that begins with thorough project management, ensuring that each stage from initial design to the final touches meets the necessary building regulations and safety standards.
Engaging a skilled tradesperson is essential to navigate the complexities of planning permission and structural work, ultimately transforming a neglected space into a valuable living area.
The initial consultation and design stage of a shell loft conversion is crucial, as it sets the foundation for the entire project, allowing homeowners to visualise how they can transform the loft into a valuable space that meets their needs and aspirations. This stage often involves architectural drawings that guide the renovation, catering to both DIY enthusiasts and those seeking professional help.
During this phase, crucial discussions take place to ensure that the architectural drawings reflect the unique vision of the homeowner. These drawings serve as a blueprint, outlining the layout, dimensions, and flow of the new living space. For DIY enthusiasts, this stage is a golden opportunity to engage with the design process, enabling them to bring their creativity to life while also gaining insight into practical considerations like building regulations and structural integrity.
By prioritising these aspects early on, individuals can ensure that the loft transformation results in a space that is not only functional but also enriching.
Learn more: How To Design A Loft Conversion
Obtaining planning permission and building regulations approval is an essential step in the shell loft conversion process, ensuring that the project adheres to local safety standards and zoning laws, especially when working on residential properties. This step not only facilitates a smooth renovation process but also protects the investment in your home.
For homeowners planning to convert their lofts, understanding the complexities of securing these permissions is crucial. Local councils may have specific requirements regarding the architectural style and size of your loft conversion.
Therefore, thorough research and consultation with professionals can help navigate the challenges associated with the approval process, ultimately leading to a successful loft conversion that enhances both functionality and property value.

The structural changes involved in a shell loft conversion are critical to ensuring the safety and longevity of the new living space, with the installation of floor joists being a key component that upholds the structural integrity of the home. Engaging professionals with expertise in structural work is essential to execute these changes effectively.
When considering a loft conversion, it is important to recognise that floor joists are not merely an afterthought; they play a pivotal role in distributing the weight of the upper structure and any furniture or occupants. This meticulous support system ensures that the load is evenly shared, thereby preventing sagging or potential structural failure.
Incorporating high-quality materials during the joist installation process can significantly extend the lifespan of the conversion, ultimately maximising both functionality and value for homeowners.
Roof work and window installation are pivotal stages in the shell loft conversion process, determining the overall aesthetic and energy efficiency of the space.
Choosing the right roofing style not only contributes to the visual charm of the home but also affects insulation and structural integrity. For instance, incorporating Velux windows into a sloping roof can significantly increase natural light, making the loft feel more open and airy.
Likewise, whether selecting a traditional dormer or a contemporary mansard option, homeowners should consider how each choice impacts ventilation. Not only do these enhancements improve aesthetic appeal, but they also create a sustainable environment by reducing the need for artificial lighting and maintaining comfortable temperatures.
The electrical and plumbing work is a fundamental aspect of a shell loft conversion, providing essential services that enhance the functionality of the new living space while adhering to safety standards. Engaging qualified professionals for these installations ensures that your home is both comfortable and compliant.
In a loft conversion, the significance of quality electrical and plumbing services cannot be overstated. These installations not only ensure the seamless operation of essential utilities but also contribute to the overall aesthetics and convenience of the space. Homeowners are often faced with a variety of necessary upgrades, including:
Hiring certified professionals guarantees adherence to local regulations and safety standards, minimising the risk of hazards such as electrical fires or plumbing leaks. This expertise helps create a safe and enjoyable environment, allowing for a successful transformation of the loft into a welcoming living area.
Insulation and plastering play a vital role in the shell loft conversion process, as they not only contribute to the energy efficiency of the new living space but also impact the overall finishes and aesthetic appeal of the area.
Proper insulation ensures a comfortable environment, while plastering provides a smooth surface for decoration.
Plus their direct effects, insulation materials such as foam board, mineral wool, or blown-in cellulose can significantly reduce heating and cooling costs by minimising heat loss and gain. This not only promotes a more sustainable lifestyle but also creates a cosy atmosphere, making the loft a desirable retreat throughout the year.
The choice of plastering techniques, whether traditional skimming or modern solutions, can influence durability and maintenance, thereby enhancing the overall energy efficiency of the structure.

The finishing touches and decoration phase of a shell loft conversion is where creativity comes into play, allowing homeowners to personalise their new living space with unique finishes and interior design elements that reflect their style and preferences.
This final stage transforms the loft from a construction project into a cosy and functional area of the home.
Understanding the significance of this phase is essential, as it not only enhances the aesthetics but also boosts the overall functionality of the loft. Homeowners can explore various finishing options, such as sleek modern designs or rustic charm, to create an ambience that resonates with their taste.
By considering these elements, one can truly make their loft conversion a reflection of their personality, transforming an ordinary space into something extraordinary.
A shell loft conversion offers numerous benefits, including the creation of additional space, which significantly enhances the value of your property while contributing to important home improvement efforts.
This investment not only maximises your living area but can also provide an attractive return when it comes time to sell your home.

The cost of a shell loft conversion can vary significantly based on several factors, including the type of conversion, the materials used, and whether you choose to hire a tradesperson or take on a DIY approach. Establishing a clear budget early in the planning process can help you navigate the expenses associated with this home improvement project.
Several key factors affect the overall cost of a shell loft conversion, including the complexity of the design, the choice of materials, and whether planning permission is required for your specific project. Hiring an experienced tradesperson can influence costs, with their expertise often leading to a more efficient and higher-quality renovation.
When considering a loft conversion, it is essential to evaluate how these factors interconnect and impact the final pricing. For instance, a straightforward design will typically incur lower expenses than a complicated layout requiring intricate structural changes.
The selected materials significantly affect the budget; options can range from budget-friendly choices to high-end finishes. One must also account for planning permissions, as navigating local regulations can add both time and cost to the project. Labour costs can vary widely, often determined by the experience and reputation of the tradespeople involved.
By carefully considering these aspects, you can better estimate the financial commitment required for a successful loft conversion.
The average cost of a shell loft conversion typically ranges from £20,000 to £60,000, although this can vary based on location, type of conversion, and the scope of work involved. Understanding these averages can help homeowners set a realistic budget for their renovation projects.
When considering a loft conversion, it is crucial to take into account various influencing factors that can affect the overall price. Homeowners should consider the following:
By evaluating these aspects in detail, homeowners can better prepare for the financial commitment associated with their loft extension, ensuring a smoother renovation experience.
When planning a shell loft conversion, it's crucial to consider additional costs that may arise beyond the initial budget, including contingencies for unexpected expenses and fees for tradespeople. Being aware of these potential costs can help you better prepare financially for your renovation project.
During the course of your loft conversion, you might encounter unforeseen issues that require immediate attention, such as:
By anticipating these potential hurdles, homeowners can allocate their budget more effectively and avoid being caught off guard during the renovation process.

The duration of a shell loft conversion can vary widely, typically taking anywhere from 8 to 12 weeks to complete, depending on the complexity of the project and the efficiency of the tradesperson involved. Effective project management and clear communication can greatly influence the timeline of your renovation.
This estimated duration is influenced by several factors, including the size of the loft space, required alterations to the existing structure, and the availability of materials needed for construction. For instance, if there are planning permission hurdles or structural reinforcements necessary, this can extend the overall timeframe significantly. The skill level and reliability of the tradespeople play a vital role:
It is crucial to set realistic expectations and anticipate potential delays to ensure a smoother journey toward enjoying that newly converted space.

Planning permission is often required for a shell loft conversion, especially in residential properties where building regulations and local planning laws must be adhered to ensure compliance with building control standards. Understanding whether your project needs permission is crucial before beginning any renovations.
Determining whether a shell loft conversion requires planning permission is essential for homeowners embarking on such projects. Various aspects influence this decision, including the type of property, its location, and specific regulations that apply to the area. For instance, properties located in conservation areas or designated listed buildings typically have stricter guidelines.
Before proceeding, it is advisable to consult with local authorities and possibly seek guidance from planning professionals to navigate the complexities and avoid potential setbacks.

Determining whether a shell loft conversion is suitable for your property involves a thorough assessment of various factors, including the existing structural integrity of the home, the type of residential property, and local building regulations. Engaging a professional to evaluate your space can provide valuable insights into the feasibility of such a project.
To begin with, you should consider the structural assessment of the existing framework, as this can significantly impact the integrity and potential of the loft space. Properties with sturdy age-old beams or rafters can often support additional weight, while newer constructions may have different requirements. The property's overall layout plays a critical role, as:
each come with their own set of challenges and opportunities for conversion.
Local regulations must also be taken into account since some areas impose strict guidelines that dictate how and when such renovations can occur. Factors like permits, historic preservation rules, and neighbourhood aesthetics all contribute to the decision-making process.

Looking to upgrade your home lighting to be more energy-efficient and long-lasting?
Retrofit LED recessed lighting could be the perfect solution for you.
In this article, we will discuss what retrofit LED recessed lighting is, the benefits of choosing this type of lighting, and the step-by-step process of installing it in your home.
We will also provide some tips for a successful installation and common mistakes to avoid.
Stay tuned to learn more about how to transform your space with retrofit LED recessed lighting.

Retrofit LED recessed lighting involves upgrading existing light fittings with LED retrofit kits to provide efficient, modern lighting solutions for various interior spaces, including homes and offices.
LED retrofit kits typically include LED bulbs, a driver, and other necessary components, making it easy to convert older fittings to energy-efficient LEDs. On the other hand, recessed lights, also known as downlights, are versatile fittings that sit flush with the ceiling, offering a sleek and subtle lighting option. These retrofit solutions are not only cost-effective but also energy-efficient, reducing electricity bills and environmental impact. Whether in kitchens, living rooms, or commercial settings, retrofit LED recessed lighting adds a contemporary touch while enhancing visibility and ambiance.
Explore in-depth: Are LED Ceiling Lights Any Good
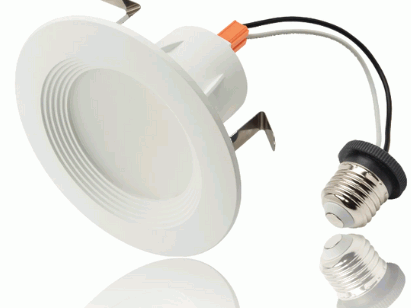
Selecting retrofit LED recessed lighting offers several benefits, including increased energy efficiency, longer lifespan of LED lights, and versatile design options suitable for various interior aesthetics.
Retrofit LED recessed lighting is highly energy-efficient, making it an eco-friendly choice for reducing electricity consumption and lowering utility bills.
LED lights are designed to consume significantly less electricity compared to traditional incandescent or fluorescent bulbs. These lights convert a greater percentage of energy into light rather than heat, resulting in lower energy waste. This improved efficiency not only translates to direct cost savings for the consumer but also has a positive impact on the environment by reducing overall electricity demand and greenhouse gas emissions.
One of the key benefits of retrofit LED recessed lighting is the longevity of LED lights, which significantly outlast traditional lighting options.
LED lights used with retrofit kits have an extended lifespan that can reach up to 50,000 hours or more, compared to the average lifespan of incandescent bulbs which is around 1,000 hours. This durability means that once installed, LED lights require minimal replacements, reducing the need for frequent maintenance and lowering overall operating costs. The longevity of these lights not only ensures consistent illumination but also contributes to environmental sustainability by reducing the number of disposed bulbs that end up in landfills.
Retrofit LED recessed lighting offers versatility in design, allowing for various downlight styles that can seamlessly blend with different interior settings.
One of the key features of retrofit LED recessed lighting is its ability to offer a wide range of downlight styles that cater to different aesthetic preferences and lighting needs. Whether you prefer a sleek and modern look or a more traditional design, there are options available to suit your desired ambiance.
For contemporary spaces, a timeless downlight style can provide a clean and minimalist appearance, seamlessly integrating into the ceiling for a seamless look. On the other hand, adjustable gimbal downlights offer flexibility in directing the light beam, making them ideal for highlighting specific areas or artworks within a room.

Installing retrofit LED recessed lighting is a straightforward DIY project that can be accomplished by following a step-by-step tutorial, ensuring a successful upgrade with LED retrofit kits.
Having all the essential items at hand before beginning the installation is crucial to ensure a smooth and efficient process. Along with the mentioned tools, you will also need a ladder for reaching the ceiling, wire strippers, a voltage tester, and a screwdriver.
Make sure to check that you have the correct size and type of LED retrofit kit for your recessed lighting fixtures to avoid any compatibility issues during the installation.
Before beginning any electrical work, it's crucial to switch off the power to the existing light fitting to ensure safety during the installation process.
Taking these precautions significantly reduces the risk of injury or damage.

Carefully remove the existing light fitting by following the steps outlined in the tutorial, ensuring not to damage the ceiling or surrounding areas.

Prepare the ceiling for the installation of the new downlights by ensuring the housing and brackets are properly positioned and secured.
Once the housing and brackets are checked, the next crucial step is to identify the optimal placement for the downlights. This involves considering the room layout, furniture arrangement, and the desired lighting effect. Proper positioning is key to achieving an even distribution of light and avoiding glare or shadows. It is recommended to create a layout plan to mark the exact spots where the downlights will be installed. Double-check the ceiling material to determine if any additional support is needed for secure installation.
Connect the wiring for the retrofit LED recessed light, ensuring all electrical connections are secure and comply with safety standards.
It is essential to follow these steps diligently to avoid any electrical hazards and ensure a properly functioning lighting system.

Install the retrofit LED recessed light by carefully positioning it into the ceiling and securing it with torsion springs, clips, or c-clips as needed.
After confirming the correct placement of the light, gently rotate the torsion springs in a clockwise motion to lock the fitting securely in place. Ensure that the clips or c-clips are properly aligned with the designated slots on the light housing.
Once everything is securely connected, test the light to ensure it functions properly before fully completing the installation. Take care to avoid over-tightening the torsion springs, as this may cause damage to the ceiling or the fitting.
After installation, test the LED lights to ensure they are functioning properly and make any necessary adjustments as per the tutorial.
Testing the lights post-installation is crucial to guarantee optimal performance and safety. Start by checking each light fitting individually, ensuring they are securely in place and connected properly. Then, switch on the lights to observe if they illuminate as expected, without flickering or dimming. If any issues arise, consult the instructional manual for troubleshooting steps. Adjust the positioning or angle of the lights if needed to achieve the desired lighting effect. Remember that thorough testing ensures a seamless and enjoyable lighting experience.
To ensure a smooth and efficient installation of retrofit LED recessed lighting, consider these helpful tips that can guide you through the DIY process and help avoid common pitfalls.
Using a voltage tester is crucial to ensure electrical safety during the installation of retrofit LED recessed lighting.
Before starting any electrical work, always remember safety first. One important step in this process is checking for live wires using a voltage tester.

Always follow the manufacturer's instructions provided with your LED retrofit kits to ensure a correct and safe installation.
These guides are carefully crafted to streamline the process and prevent any potential hazards that may arise from incorrect installation methods. They typically include step-by-step procedures, recommended tools, and safety precautions to be followed during the setup. Adhering to these instructions not only guarantees efficient performance but also extends the lifespan of your LED lighting system.
Some common steps covered in the guide may include identifying the right fixtures for your space, ensuring proper wiring connections, and testing the lights post-installation. They often emphasize the significance of turning off the power supply before commencing any work and handling the components with care to avoid damage.
If you are unsure about handling electrical wiring or the installation process, consider hiring a professional to ensure the job is done safely and correctly.
Electrical wiring can be a complex and potentially hazardous task that requires specific knowledge and skills to execute properly. A professional electrician possesses the expertise to navigate the intricacies of electrical systems, ensuring that all connections are secure, circuits are correctly set up, and safety measures are implemented.
Professionals are equipped with the necessary tools and equipment to conduct the installation efficiently and effectively. They can also identify and troubleshoot any potential issues that may arise during the process, providing a seamless and reliable solution. By hiring a professional, you not only save time and effort but also minimise the risk of accidents or errors.
When installing retrofit LED recessed lighting, it's important to be aware of common mistakes that can hinder the process and affect the final outcome, especially for DIY enthusiasts.
One of the most critical mistakes is not turning off the power before starting the installation, which poses significant safety risks.
Inadequately shutting off the power supply can result in electrical shocks, fires, or even fatalities. It's essential to locate the main circuit breaker or fuse box and switch off the power to the specific area where the installation will take place. This step is vital in preventing accidental contact with live wires.
Once the power is turned off, double-check by using a non-contact voltage tester to ensure there is no electricity running through the circuits. These testers are affordable and can save lives by indicating the presence of current.
It's advisable to inform others in the household or workplace about the power shutdown to avoid any accidental reconnection. Taking these precautions will help create a safe working environment during the installation process.
Incorrect wiring can lead to malfunctioning lights and potential safety hazards, making it essential to follow proper wiring techniques during installation.
Aside from safety concerns, correct wiring also ensures optimal performance and efficiency of electrical systems. One common mistake is not securing connections properly, leading to loose wires and potential short circuits.
Regular testing using a multimeter can help confirm that all connections are functioning as they should. Remember, taking the time to wire things correctly can save you from headaches down the road.
Not measuring the ceiling space properly for downlights can result in improper fitting and alignment issues during the installation.
Accurate measurements are crucial to ensure that the downlights fit seamlessly into the ceiling, enhancing the overall aesthetics of the room. To measure the ceiling space correctly, start by determining the placement of each downlight. Use a measuring tape to find the exact distances between each intended fixture location. It's also important to account for any obstructions or existing fixtures that may impact the installation process.
Investing in tools like a laser level or a stud finder can greatly assist in achieving precise measurements. A laser level helps you mark accurate positions on the ceiling, while a stud finder can identify any structural elements that may affect the installation.