01603 327962
Plastering a ceiling may seem like a daunting task, but with the right tools and techniques, it can be a rewarding DIY project.
In this comprehensive guide, we will walk you through the process from start to finish. From preparing the ceiling and mixing the plaster to applying it smoothly and finishing off with a professional touch, we will cover all the steps and tips you need to know for a successful plastering project.
Let's get started!
Plastering is the process of applying a smooth, durable, and often decorative coating to walls or ceilings. It involves using a variety of tools and techniques to achieve a professional finish.
This plastering technique has been utilised for centuries, dating back to ancient civilisations where it served both functional and aesthetic purposes. Initially, plastering was done using primitive methods such as clay or mud-based mixtures applied to surfaces. Advancements in technology and materials have led to the evolution of modern plastering practices.
Before applying plaster, proper surface preparation is crucial to ensure adhesion and longevity. This entails cleaning, priming, and repairing any imperfections on the wall or ceiling. Different types of plaster, including lime, gypsum, and cement-based, offer diverse characteristics suitable for various applications.
Explore: How Much Does Venetian Plastering Cost
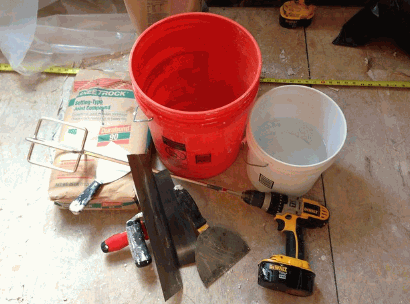
When plastering a ceiling, essential tools and materials include a trowel, hawk, plasterboard, jointing compound, and mix for a smooth finish. These tools are crucial for achieving a seamless and professional plastering job.
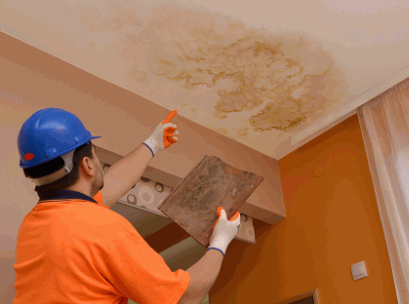
Preparing the ceiling for plastering is a crucial step to ensure a successful outcome. Proper surface preparation involves cleaning the ceiling, repairing any damages, and creating a smooth base for the plaster to adhere to.
Cleaning the ceiling before plastering involves removing dust, dirt, and debris to ensure a clean and smooth surface. One effective method is to use a solution of PVA to prime the ceiling for plaster adhesion.
Before starting the cleaning process, it is crucial to protect the surrounding areas with dust sheets to prevent any splatter or spillage. Begin by dusting the ceiling surface thoroughly using a broom or a vacuum cleaner with a brush attachment to remove loose particles. Once the loose debris is cleared, wipe down the ceiling with a damp cloth or sponge to eliminate any remaining dirt or grime.
After the initial cleaning, prepare a solution of PVA (Polyvinyl acetate) adhesive and water in a 1:4 ratio. Apply this solution evenly on the ceiling surface with a paintbrush or roller to create a strong bond between the plaster and the ceiling. The PVA primer not only enhances adhesion but also seals the surface, ensuring a uniform finish.
Repairing damages on the ceiling involves filling cracks, holes, or imperfections using suitable materials like a jointing compound or filler. Smoothing the edges with sandpaper ensures a seamless transition between the repaired areas and the rest of the ceiling.
Once the filler has been applied and the edges have been smoothed out, the next crucial step in ceiling repair is priming the repaired areas before applying plaster. Priming not only helps the new material adhere better but also ensures a uniform texture and finish across the entire surface.
It's important to select a high-quality primer that is compatible with both the filler material and the plaster you plan to use. Apply the primer evenly with a brush or roller, covering all the repaired spots thoroughly.
Allow the primer to dry completely before proceeding with the plastering process. This waiting period is necessary to prevent any potential issues with adhesion or texture once the plaster is applied.
Mixing plaster correctly is essential for achieving the desired consistency and workability. The ratio of plaster to water plays a crucial role in determining the quality of the mix.
The correct ratio of plaster to water is crucial for obtaining the desired consistency. A common recommendation is to start with small batches and gradually adjust the ratio until the mix is smooth and workable.
This precision in mixing plaster is essential in ensuring a successful plastering job. The plaster-to-water ratio determines the strength, setting time, and workability of the plaster, directly influencing the final outcome of the surface. It is advised to maintain a consistent ratio throughout the entire process to avoid inconsistencies. When adjusting the ratio, remember that a higher water content can lead to weaker plaster, while a lower water content may result in difficulties with application and curing. Understanding the impact of the plaster-to-water ratio is fundamental for achieving a durable and aesthetically pleasing finish.
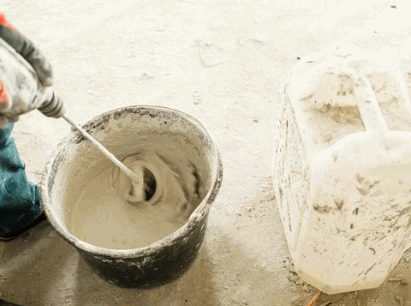
Mixing plaster involves slowly adding plaster to water while continuously mixing to avoid lumps. Consistency is key, so adjusting the water-to-plaster ratio gradually is recommended for a smooth mix.
Once you've added the plaster to the water, maintain a steady mixing motion to ensure a homogeneous mixture. It's crucial to scrape the sides and bottom of the container to integrate all the components fully.
Consistency checks are vital during this process; aim for a creamy, lump-free texture. If the mixture feels too thick, carefully add small amounts of water until you reach the desired smoothness.
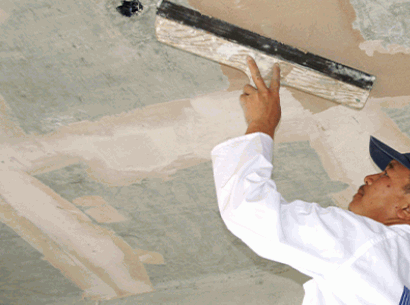
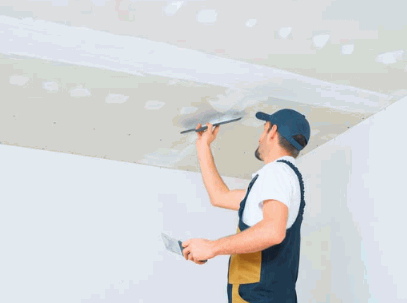
Applying plaster on the ceiling requires skill and precision to achieve an even coat and smooth finish. Using the right technique and tools, such as a float and plasterboard, is essential for a professional result.
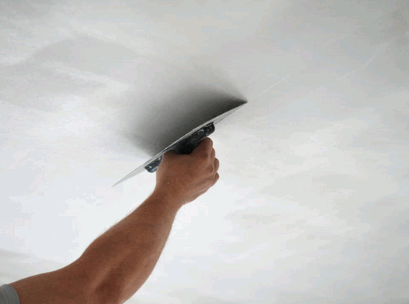
Various techniques can be used to apply plaster on the ceiling, including the hawk and trowel method, the flat smoothing technique, and the DIY approach for small areas. Each technique offers unique benefits and challenges.
When using the hawk and trowel method, skilled craftsmen work with a hawk and a trowel to apply a smooth and even layer of plaster. This technique is commonly used for larger surface areas and allows for precision and control over the final finish.
The recommended thickness of plaster for ceilings varies based on the surface condition and desired finish. Smoothing the edges and maintaining a consistent thickness is essential for a professional-looking result.
When determining the appropriate plaster thickness for a ceiling, one must take into account the underlying imperfections of the surface. Uneven surfaces may require a thicker coat to achieve a smooth finish, while smoother substrates may need less plaster to cover imperfections.
The desired level of finish plays a crucial role in deciding the thickness. A finer finish may necessitate a thinner application, whereas a textured or decorative finish might require a thicker layer to achieve the desired effect.
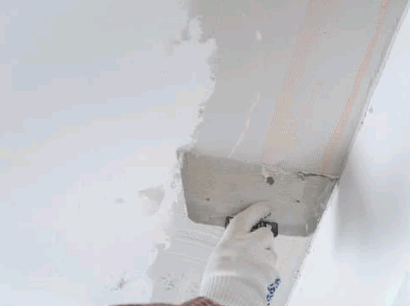
Achieving a smooth finish on plastered ceilings requires the use of appropriate tools and techniques. Smoothing out the plaster with sandpaper or a trowel helps eliminate imperfections and create a flawless surface.
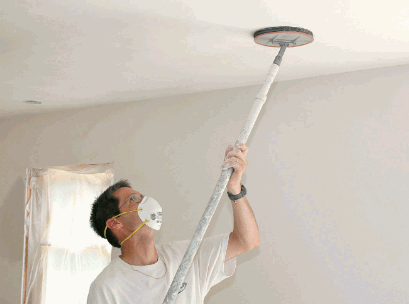
Tools such as a hawk, brush, or trowel can be used for smoothing out plaster on ceilings. Each tool offers unique benefits in achieving a polished finish and ensuring uniform coverage.
Regarding plaster smoothing, the hawk serves as a portable platform for holding the plaster, allowing the user to easily dip the trowel into the mixture. Brushes are essential in creating a smooth and even surface by spreading the plaster evenly. On the other hand, trowels are instrumental in refining the texture, ensuring a flawless finish. By skillfully using these tools in combination, professionals can create beautifully plastered ceilings with a professional touch.
Completing the plastering process involves creating a seamless and polished look by carefully addressing edges, applying a final coat, and ensuring uniform coverage. Attention to detail during the finishing stage is crucial for a professional outcome.
Creating a smooth finish on plastered ceilings involves following specific steps such as feathering edges, using a hawk for seamless application, and applying thin coats for optimal results. DIY enthusiasts can achieve professional-looking finishes with attention to detail.