Are you considering going solar but unsure of how the installation process works? Look no further! In this informative article, we will take you through the step-by-step process of installing solar panels, providing valuable insight and addressing any concerns you may have. Going solar has never been easier, so let's dive in!
What Are The Types Of Solar Panels
When it comes to harnessing solar energy, there are various types of solar panels on the market. In this section, we will discuss the different types of solar panels and how each one functions. From the highly efficient monocrystalline solar panels to the cost-effective polycrystalline solar panels, we will explore the unique characteristics and benefits of each type. We will also touch on the newer technology of thin-film solar panels and how they differ from traditional solar panels.
Check out: What Are Solar Panels
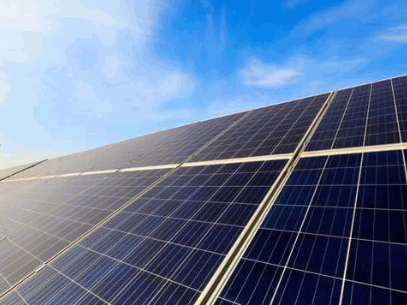
1. Monocrystalline Solar Panels
Monocrystalline solar panels are renowned for their high efficiency and long lifespan. The process of installing these panels typically involves the following steps:
- Conducting a thorough site assessment to determine the most suitable location for maximum sunlight exposure
- Designing and planning a layout that will optimize energy production
- Obtaining necessary permits and approvals from local authorities
- Preparing the roof to ensure a stable and secure surface for mounting the panels
- Securely mounting the solar panels onto the roof
- Wiring and connecting the panels to seamlessly integrate them into the electrical system
- Conducting a final inspection and activating the panels to ensure proper functionality
For optimal performance, it is recommended to seek professional installation and regularly maintain the panels.
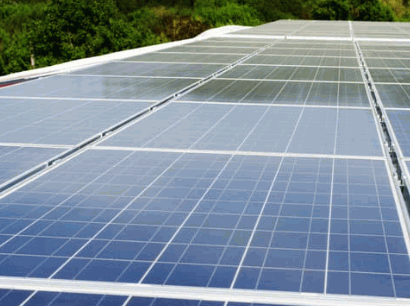
2. Polycrystalline Solar Panels
Polycrystalline solar panels also referred to as multi-crystalline solar panels, are composed of multiple silicon crystals. These panels are easily identifiable by their square-shaped and typically blue-colored solar cells. They are a cost-effective option that provides a good balance between efficiency and affordability, making them a popular choice for both residential and commercial solar installations.
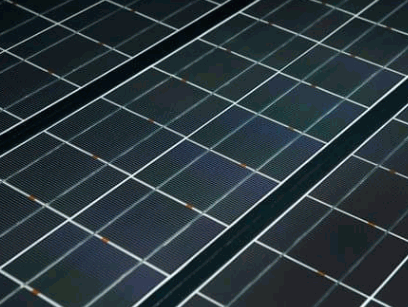
3. Thin-Film Solar Panels
- Thin-film solar panels are created by depositing one or multiple thin layers of photovoltaic material onto a substrate.
- These panels are lightweight, flexible, and have a wide range of applications such as in solar-powered calculators, satellites, and backpacks.
- The installation process involves mounting the panels onto a supporting structure and connecting them to the electrical system.
The development of thin-film solar panels can be traced back to the 1970s, with continuous advancements resulting in improved efficiency and cost-effectiveness.
What Are The Steps To Installing Solar Panels?
The installation of solar panels is a multi-step process that requires careful planning and execution. In this section, we will break down each step involved in installing solar panels. From assessing the site to obtaining permits and approvals, to actually mounting the panels and connecting them to the electrical system, we will cover every aspect of the installation process. By understanding each step, you will have a better understanding of the time and effort that goes into installing solar panels.
1. Site Assessment
- Assess the orientation, shading, and available space of the site to determine the optimal placement of solar panels.
- Evaluate the condition of the roof and its structural integrity to ensure it is capable of supporting the panels.
- Analyze the local climate and weather patterns to estimate the amount of solar exposure and potential energy production.
- Evaluate the electrical infrastructure and grid connection to ensure compatibility with the installation of a solar system.
2. Design And Planning
- Assess energy needs and available sunlight.
- Design and plan panel layout and placement for optimal sun exposure.
- Plan for future expansion and potential shading issues.
- Consider budget, financing options, and available incentives.
The early designs and planning for solar panels date back to the 19th century, with the first solar cell developed by Charles Fritts in 1883, marking the beginning of harnessing solar energy for practical use.
3. Obtaining Permits And Approvals
- Review the regulations in your local area to determine which permits and approvals are necessary.
- Submit thorough and detailed permit applications to the relevant authorities.
- Wait for the approvals, which may require inspections or additional documentation.
- Once approvals are received, make sure to comply with any conditions specified by the authorities.
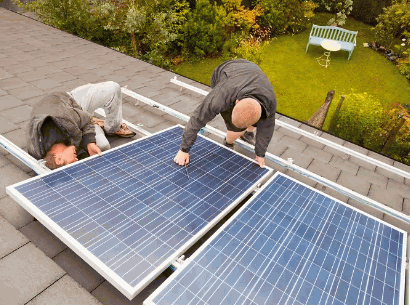
4. Roof Preparation
- Prepare the roof surface by clearing it of any debris, dirt, or obstructions to create a clean installation area.
- Thoroughly inspect the roof for any damage or weak spots that may require repair before the installation process.
- Confirm that the roof is structurally sound and capable of supporting the weight of the solar panels and mounting equipment.
- Determine the optimal location for the solar panels to ensure maximum sun exposure and efficiency.
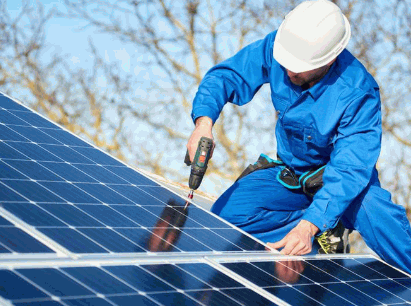
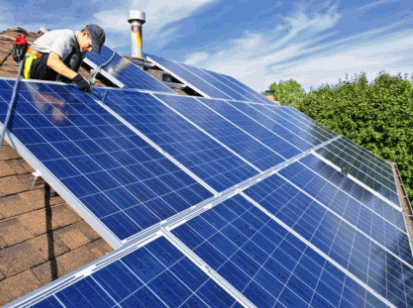
5. Mounting The Solar Panels
- Positioning: Determine the ideal location on your roof with maximum sunlight exposure.
- Attachment: Secure the mounting hardware to the roof, ensuring it is waterproof and sturdy.
- Frame Installation: Place the solar panels on the mounting structure and secure them in place.
- Wiring: Connect the panels to the electrical system, ensuring proper grounding and connectivity.
- Angle Adjustment: Set the optimal tilt angle for the panels to maximize energy production.
Fact: The angle at which solar panels are mounted can significantly impact their energy output, with the optimal angle varying based on geographical location.
6. Electrical Wiring And Connection
- Design the electrical layout and connection of solar panels in compliance with local electrical codes.
- Install the necessary wiring from the solar panels to the inverter, making sure to create weatherproof connections.
- Connect the inverter to the main electrical panel, following all safety protocols and guidelines.
- Thoroughly test the electrical connections and system functionality before completing the installation process.
7. Final Inspection And Activation
- Verify Panel Installation: Ensure that the panels are correctly mounted, facing the correct direction, and free from any physical damage.
- Electrical Connection: Confirm that the wiring, grounding, and connection to the electrical system are all correct.
- Meter Installation: Have a bidirectional meter installed to track both power generation and consumption.
- Utility Inspection: Schedule a final inspection with the local utility to approve the system's connection to the grid.
- System Activation: Upon approval, activate the solar panel system to start harnessing solar energy.
What Are The Safety Precautions For Installing Solar Panels?
As solar energy becomes increasingly popular, more and more homeowners are considering installing solar panels on their roofs. However, this process requires careful attention to safety precautions to prevent accidents and injuries. In this section, we will discuss the various safety measures that must be taken when installing solar panels, including working with heights, electrical safety, and proper handling of materials and equipment. By following these precautions, you can ensure a safe and successful solar panel installation.
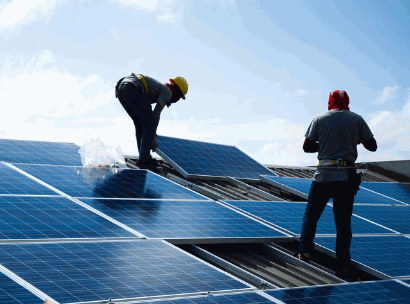
1. Working With Heights
- Before beginning any task involving heights, it is important to assess the height and nature of the work area.
- When working at elevated levels, it is crucial to use appropriate safety equipment such as harnesses, lanyards, and guardrails.
- All employees should receive proper training on the safe use of ladders, lifts, and scaffolds.
- To ensure safety, it is important to regularly inspect and maintain all equipment used for working at heights.
- When working at heights, it is important to consider weather conditions, wind speeds, and other environmental factors.
When working with heights, safety should always be prioritized by conducting thorough risk assessments, providing adequate training, and utilizing proper safety equipment to prevent accidents and injuries.
2. Electrical Safety
- When working on electrical projects, remember to use insulated tools and equipment.
- Before beginning any work on solar panels, always turn off the electrical supply.
- Proper grounding and bonding of electrical components is crucial for safety.
- Make sure to regularly inspect the wiring for any signs of wear and tear or damage from rodents.
For extra precaution, consider purchasing a fire extinguisher specifically rated for electrical fires and participate in periodic training for electrical safety protocols.
3. Proper Handling Of Materials And Equipment
- Use appropriate personal protective equipment (PPE) like gloves, safety glasses, and steel-toed boots when handling materials and equipment.
- Handle solar panels with care to avoid breakage during transportation and installation.
- Ensure proper storage of panels and equipment in a secure and dry location.
What Are The Maintenance Requirements For Solar Panels?
As solar energy becomes increasingly popular, it is important to understand the proper maintenance requirements for solar panels. Neglecting regular upkeep can significantly impact the performance and lifespan of these renewable energy systems. In this section, we will discuss the three main maintenance tasks that are necessary for keeping solar panels functioning at their best: regular cleaning, monitoring performance, and repair or replacement of parts. By following these maintenance practices, you can ensure that your solar panels continue to provide efficient and sustainable energy for years to come.
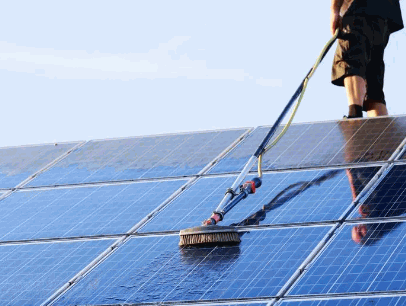
1. Regular Cleaning
- Inspect the solar panels for dirt, dust, and debris accumulation.
- Use a soft brush or cloth with mild detergent and water to clean the panels regularly.
- Rinse the panels thoroughly with clean water after cleaning.
- Repeat the regular cleaning process, especially in areas with high levels of dust or pollution.
2. Monitoring Performance
- Regularly monitor the energy output of the solar panels using a monitoring system to ensure optimal performance.
- Compare the actual energy production with the expected performance to identify any discrepancies and take necessary actions.
- Continuously monitor for any physical damage, shading, or debris that may impact the panels' performance.
3. Repair And Replacement Of Parts
- Assess the damaged parts and identify the specific components that require repair or replacement.
- Procure the necessary replacement parts from either the solar panel manufacturer or authorized dealers.
- Follow the manufacturer's guidelines and safety protocols while conducting the repair or replacement.
- Ensure proper disposal of any damaged or worn-out parts in accordance with environmental regulations.
Did you know? With proper maintenance and occasional replacement of parts, solar panels can last for 25-30 years.